
Fat Dissolving Injections: How Many Sessions Do You Need and When Will You See Results?
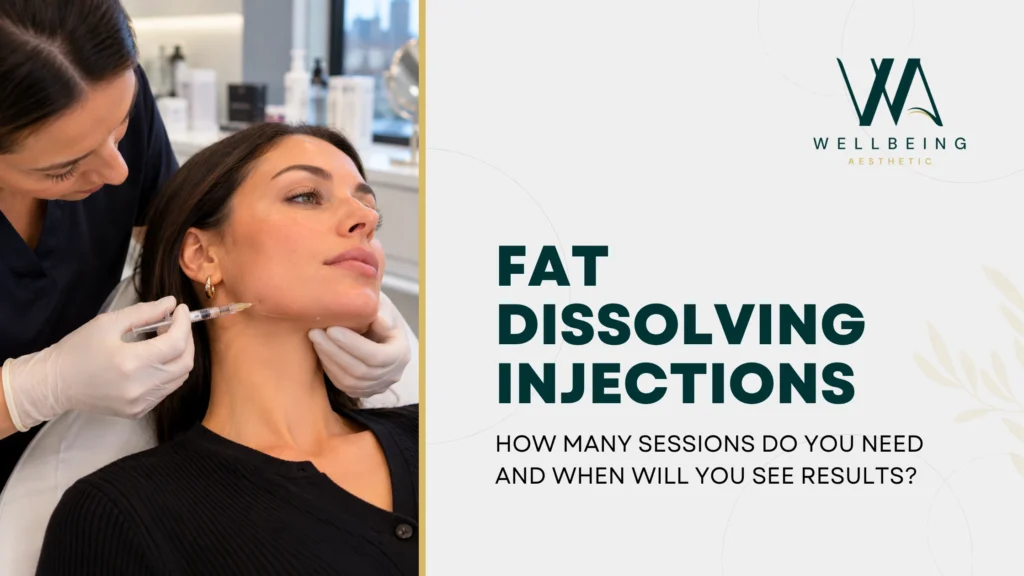
Fat Dissolving Injections: How Many Sessions Do You Need and When Will You See Results? The number of fat dissolving injection sessions depends on the product used, treatment area and amount of localised fat. For licensed deoxycholic acid treatment under the chin, two to four sessions are often sufficient, with sessions spaced at least four weeks apart, although some people may need fewer or more. A stubborn pocket of fat under the chin that will not shift, however consistent the diet and exercise routine, is one of the most common reasons people start looking into fat dissolving injections at Wellbeing Aesthetic’s Croydon clinic, usually alongside anti-wrinkle injections and dermal fillers. The most common question at consultation is not whether the treatment works, but how many sessions it actually takes and how long it will be before a difference is visible. Both answers depend on the area being treated, the amount of fat present, and how an individual’s body responds, which is why a course is planned rather than promised as a single visit fix. This guide sets out how fat dissolving injections work, what a realistic session plan looks like, when results typically begin to show, what side effects to expect, and who should avoid the treatment altogether. None of this replaces a proper consultation. Fat dissolving injections are not a weight loss treatment, and whether they are the right option for you depends on an assessment of the specific area of concern, not a generic session count. Key Takeaways Most courses need two to four sessions. The exact number depends on the area treated, the amount of fat present, and how the body responds between appointments. Sessions are spaced a few weeks apart. This interval gives the body time to clear broken-down fat cells through the lymphatic system before the next treatment. Results build gradually, not overnight. A visible change is usually noticed after the second session rather than immediately following the first. The chin and jawline are the most requested area. Submental fat, commonly called a double chin, is the area most people treat first, though other small pockets of fat can also respond. It is not a weight loss treatment. Fat dissolving injections target specific, localised pockets of fat and are not designed or recommended for general weight management. Results are considered permanent for treated cells. Once a fat cell is broken down and cleared, it does not return, though this assumes a broadly stable weight afterwards. Swelling and tenderness are expected, not a warning sign. Temporary swelling, redness and bruising around the injection site are a normal part of how the treatment works. Not everyone is a suitable candidate. Pregnancy, certain medical conditions, and active skin infections in the treatment area generally rule out treatment. What Are Fat Dissolving Injections? Fat dissolving injections’ is a broad term and different injectable products may contain different ingredients. One clinically established option for reducing submental fat is deoxycholic acid, which works by disrupting fat-cell membranes Once a fat cell has been broken open, the body clears its contents away through the lymphatic system over the following weeks. This is different to how dermal fillers or Profhilo work, since those treatments add volume or stimulate collagen rather than remove fat cells. You can see the kind of change this treatment produces in the Wellbeing Aesthetic gallery, alongside the clinic’s other non-surgical treatments. Which Areas Can Be Treated? The submental area, under the chin, is by far the most requested treatment site, since it redefines the jawline and profile without surgery or downtime. It is also the area with the most established research behind it. Under the chin and along the jawline, the most common and most studied area Small, stubborn pockets of fat elsewhere on the body, where appropriate, following an in-person assessment Fat dissolving injections work best on small, well-defined pockets of fat rather than larger areas, and are not a substitute for a healthy diet and regular exercise. How Many Sessions of Fat Dissolving Injections Do You Need? Most courses involve two to four sessions, spaced a few weeks apart, though the exact number depends on the area being treated, how much fat is present, and how the individual responds to earlier sessions. Spacing sessions a few weeks apart is not arbitrary. It gives the body time to clear the broken-down fat cells from the previous treatment before more is targeted, and it lets the practitioner assess progress before deciding whether, and how much, further treatment is needed. Stage What Typically Happens Rough Timing Session 1 Initial treatment of the target area, with swelling expected for several days afterward Week 0 Between sessions The body clears broken-down fat cells gradually via the lymphatic system Weeks 1 to 3 Session 2 Most patients begin to notice a visible change around this point Weeks 3 to 6 Further sessions Additional sessions as assessed, up to a typical course total of 2 to 4 Weeks 6 to 12 Final assessment Practitioner reviews the finished result once swelling has fully settled Several weeks after the last session EXPLORE YOUR OPTIONS If a stubborn pocket of fat under the chin or jawline has been bothering you, it’s worth exploring the full range of treatments available at Wellbeing Aesthetic before deciding what to book. Explore Treatments → When Will You See Results? Results build gradually rather than appearing immediately. The treated fat cells are broken down over the days and weeks following each session, which means early changes are often subtle and become clearer as the course progresses. Most people start to notice a visible difference after their second session, once the body has had time to clear away fat broken down in the first. A full, settled result is usually assessed several weeks after the final session in the course, once any lingering swelling has gone down completely. What Happens During a Fat Dissolving Session? Consultation and assessment. Your practitioner reviews the treatment area, your medical history and your goals, and confirms
Polynucleotides Under Eyes: Benefits, Results, Side Effects and How Long They Last
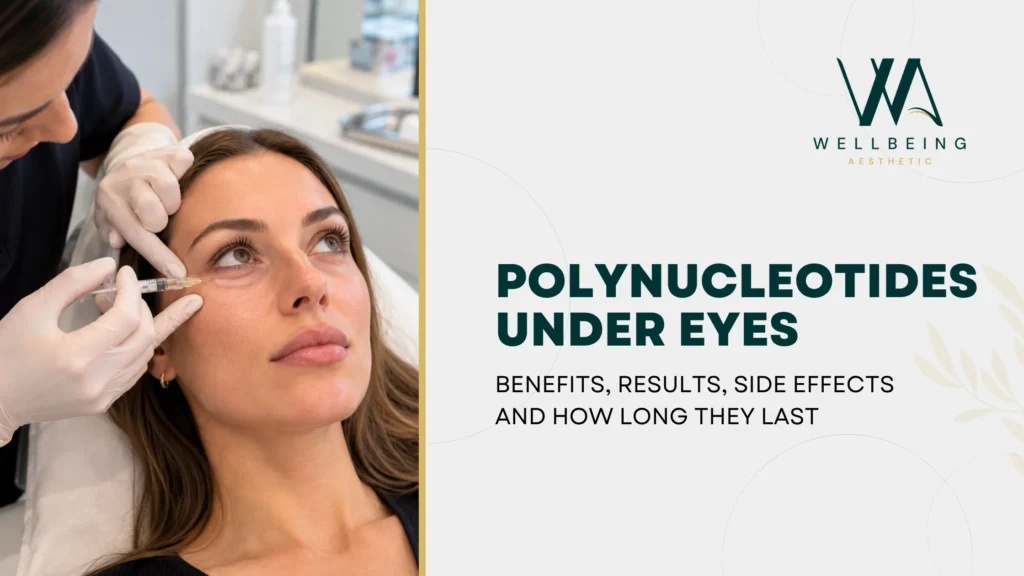
Polynucleotides Under Eyes: Benefits, Results, Side Effects and How Long They Last Under-eye polynucleotides are injectable treatments used to improve skin quality rather than add volume. They may help with thin, crepey or dehydrated-looking skin and fine lines, while true under-eye hollows usually require a different approach. Treatment normally involves a short course rather than one appointment. Concealer can settle into fine lines when under-eye skin is dry, thin or crepey, although several factors can contribute to how the area looks. It is one of the reasons polynucleotides have become part of Wellbeing Aesthetic’s regenerative treatment range in Croydon, alongside dermal fillers and Profhilo. Unlike a filler, polynucleotides do not add volume under the eyes. They work at a cellular level to support the skin’s own repair processes, which is why they are often considered for thin, crepey or tired-looking under-eye skin rather than visible hollows. This guide covers what polynucleotides actually are, how they work under the eyes, what results and side effects to realistically expect, how long results last, and who should avoid the treatment altogether, including an important point about fish allergy. None of this replaces a proper consultation. Skin type, medical history and your goals all affect whether polynucleotides are the right starting point for you, which is why a treatment plan should always begin with an assessment rather than a menu. Key Takeaways Repairs rather than fills. Polynucleotides work at a cellular level to support skin repair and regeneration rather than adding volume the way a filler does. Built around a short course. Most practitioners recommend three to four sessions spaced two to four weeks apart rather than a single appointment. Results build progressively. Improvements in skin texture, hydration and fine lines typically develop over the weeks following treatment, not immediately. Fish allergy is an important contraindication. Most polynucleotide products are derived from purified salmon DNA, so a known fish or seafood allergy generally rules out this treatment. Not a fix for hollowing caused by volume loss. Under-eye hollows from lost structure are usually better addressed with a dermal filler rather than polynucleotides. Side effects are usually mild. Temporary swelling, bruising or tenderness at injection points are the most commonly reported reactions. Results can last several months. Benefits build across a course and are generally reported to last around six months, with maintenance reviewed individually. Pricing reflects the clinic and course length. UK under-eye polynucleotide sessions generally fall between £250 and £500 each. What Are Polynucleotides? Polynucleotides are an injectable treatment made from purified DNA fragments, designed to support the skin’s own repair and regeneration processes rather than add shape or volume. They are often grouped with other bio-stimulatory treatments because they work with the skin’s biology instead of sitting beneath it like a filler. Most polynucleotide products used across the industry are derived from purified salmon DNA, which is why a known fish or seafood allergy is treated as an important contraindication and something your practitioner will ask about at consultation. You can see examples of the results this treatment produces in the Wellbeing Aesthetic gallery, alongside the clinic’s other regenerative treatments. How Do Polynucleotides Work Under the Eyes? The skin under the eyes is thinner and more delicate than almost anywhere else on the face, which is why it is often the first area to show fine lines, crepiness or a tired appearance. A practitioner delivers small, precise deposits of polynucleotides just beneath the skin surface in this area. Once injected, the fragments support the activity of fibroblasts, the cells responsible for producing collagen and elastin, while also helping the tissue hold moisture. Over several weeks, many patients notice firmer, better hydrated skin with a smoother texture around the eyes. What Are the Benefits of Polynucleotides Under the Eyes? Improved skin texture and firmness as collagen and elastin production is supported Better hydration in an area that is often thin and prone to dryness A reduction in the appearance of fine, superficial lines under the eyes Suitability for patients who do not want, or do not need, added volume in this area A regenerative option that can be considered alongside or instead of filler, depending on the underlying cause of your concern These are gradual, quality-focused outcomes rather than a dramatic change overnight. Where skin repair and texture are the main goal rather than volume, some patients also ask about PRP treatment, which works on a similar regenerative principle using the patient’s own plasma. Polynucleotides vs Dermal Filler vs Profhilo for Under Eyes These three treatments are sometimes confused because they can all be used around the eyes, yet they solve different problems. The table below sets out how they compare. Treatment Main Purpose Typical Results Last Best For Polynucleotides Cellular repair and skin regeneration Around 6 months Thin, crepey or tired-looking under-eye skin without hollowing Dermal Filler Restoring lost volume in the tear trough 9 to 18 months Visible hollows or shadowing caused by lost volume Profhilo Bio-remodelling and collagen stimulation 6 to 12 months General skin laxity across the face, neck or hands If your main concern under the eyes is a visible hollow rather than skin quality, our lip filler swelling stages guide gives a sense of what to expect from hyaluronic acid filler healing, since the same product category is often used in the tear trough. EXPLORE YOUR OPTIONS If skin quality, rather than lost volume, is your main concern under the eyes, it’s worth exploring the full range of treatments available at Wellbeing Aesthetic before deciding what to book. Explore Treatments → What Happens During a Polynucleotide Treatment for Under Eyes? Consultation and assessment. Your practitioner reviews your skin, medical history and goals, and screens specifically for fish allergy before confirming you are suitable. Cleansing and preparation. The area is cleaned thoroughly, and numbing cream can be applied if you find injections uncomfortable. Micro-injections. Small, precise deposits are placed just beneath the skin around the orbital area using a fine needle. Aftercare guidance. You will be talked
Profhilo Treatment in London: Benefits, Cost, Results and Aftercare
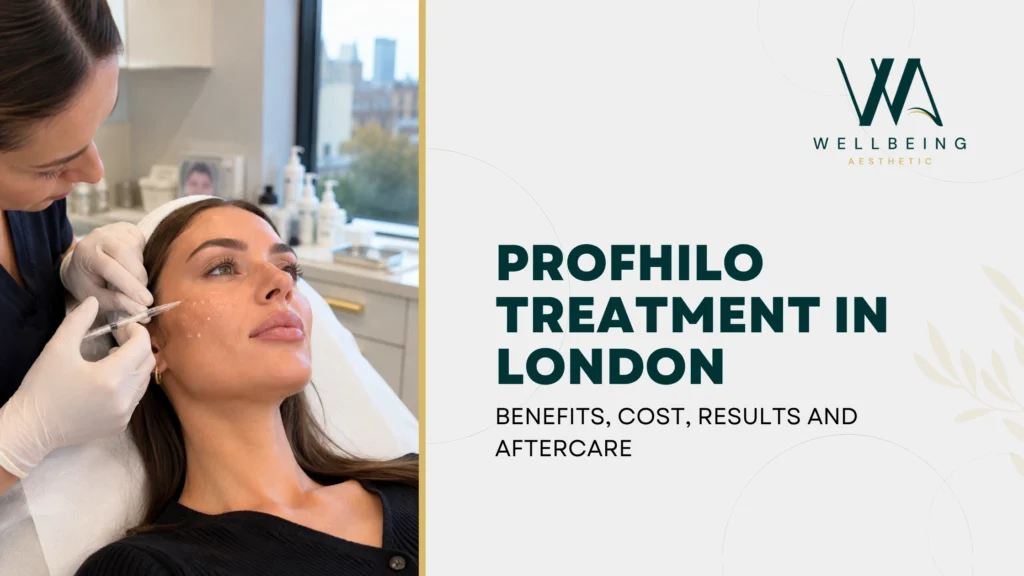
Profhilo Treatment in London: Benefits, Cost, Results and Aftercare Crepey, thinning skin around the jawline or neck rarely responds to a heavier moisturiser or a stronger serum. It is one of the reasons Profhilo has become one of the most requested treatments at Wellbeing Aesthetic’s Croydon clinic, alongside anti-wrinkle injections and dermal fillers. Unlike a filler, Profhilo does not add volume or reshape a feature. It works beneath the skin to encourage your own collagen and elastin production, gradually improving firmness, hydration and overall skin quality rather than filling a specific line or hollow. If you are in Croydon or the wider South London area and searching for what a Profhilo treatment actually involves, this guide covers how it works, what it costs, how long results last, and what a sensible aftercare routine looks like. None of this replaces a proper consultation. Skin type, medical history and your goals all affect whether Profhilo is the right starting point, which is why a treatment plan should always begin with an assessment rather than a menu. Key Takeaways Bio-remodelling, not volumising. Profhilo stimulates the skin’s own collagen and elastin rather than adding volume the way a dermal filler does. Built around two sessions. A standard course is two treatments spaced around four weeks apart, rather than a single appointment. Results build gradually. Most people notice firmer, more hydrated skin developing over several weeks as collagen and elastin production increases. Results generally last six to twelve months. Maintenance is usually considered from six months onward and reviewed individually rather than fixed to a single schedule. It is not the same as anti-wrinkle injections. Profhilo does not relax muscles, so it will not soften lines caused by repeated expression. Downtime is minimal for most people. Small bumps at injection points typically settle within a day, with occasional mild bruising. Pricing reflects the clinic and product, not a fixed figure. UK Profhilo sessions generally fall between £250 and £450 each, with a two-session course often costing £500 to £900. Not everyone is a suitable candidate. Pregnancy, breastfeeding, active skin infections, and certain allergies typically mean postponing treatment until a practitioner confirms it is appropriate. What Is Profhilo? Profhilo is an injectable treatment containing a high concentration of hyaluronic acid, developed to improve skin quality rather than add shape or volume. It is often described as a bio-remodelling treatment because it works with the skin’s own repair processes rather than sitting under the surface as a filler would. A practitioner injects the product at a small number of points, typically five per side of the face, where it spreads through the tissue and stimulates the production of collagen and elastin. Because the formulation is designed to disperse rather than hold a shape, Profhilo does not change facial contour. How Does Profhilo Work? Profhilo contains 64 mg of hyaluronic acid in a 2 ml syringe, combining high and low molecular weight hyaluronic acid used in aesthetic medicine, combined in a way that allows it to spread slowly through the skin after injection. As it disperses, it draws in moisture and triggers fibroblasts, the cells responsible for producing new collagen and elastin. This process, often called bio-remodelling, unfolds gradually rather than immediately. Over several weeks, many patients notice firmer, more hydrated skin with a smoother texture, particularly in areas prone to laxity such as the lower face, neck and hands. What Are the Benefits of Profhilo Treatment? Improved skin firmness and elasticity as collagen and elastin production increases. Improved skin hydration through injectable hyaluronic acid, thanks to the high hyaluronic acid concentration. A smoother, more even texture, often described as a healthier rather than a dramatically different look. Suitability for areas that do not need volume, such as the neck, jawline, and backs of the hands. Subtle skin-quality improvement without adding the structural volume associated with dermal fillers. These are gradual, quality-focused outcomes rather than a dramatic transformation. If you would like to see how Profhilo compares with the clinic’s other treatments, the Wellbeing Aesthetic gallery shows results across the range of services offered. Profhilo vs Dermal Fillers vs Skin Boosters: What Is the Difference? These three injectable treatments are frequently confused because they can all use hyaluronic acid, yet they solve different problems. The table below sets out how they compare. Treatment Main Purpose Typical Results Last Best For Profhilo Bio-remodelling and collagen stimulation 6 to 12 months Overall skin laxity and quality across the face, neck or hands Dermal Fillers Restoring lost volume and contour 9 to 18 months Hollowed cheeks, thinning lips, or lost facial structure Skin Boosters Deep hydration and improved texture 4 to 6 months Dull, dehydrated or tired looking skin without volume loss COMPARE YOUR OPTIONS If skin laxity, rather than lost volume, is your main concern, it’s worth exploring the full range of treatments available at Wellbeing Aesthetic before deciding what to book. Explore Treatments → Who Is Profhilo Suitable For? Profhilo tends to suit people noticing early skin laxity, crepiness or dullness rather than deep, static wrinkles or significant volume loss. Profhilo may suit adults experiencing mild skin laxity, crepiness, dehydration or declining skin quality who want improvement without adding structural volume. If your main concern is lines caused by repeated expression, such as frown lines or crow’s feet, our anti-wrinkle treatment guide explains that option in more depth, since Profhilo is not designed to relax muscle movement. What Happens During a Profhilo Treatment in London? Consultation and skin assessment. Your practitioner reviews your skin, medical history, and goals before confirming Profhilo is appropriate for you. Cleansing and preparation. The treatment area is cleaned thoroughly, and numbing cream can be applied if you find injections uncomfortable. Injections at key points. A small number of injections, typically five per side, deliver the product beneath the skin at carefully chosen points. Aftercare guidance. You will be talked through what to expect over the following days and given advice on protecting your results. A second session around four weeks later. The standard
Skin Boosters vs Dermal Fillers: What Is the Difference?
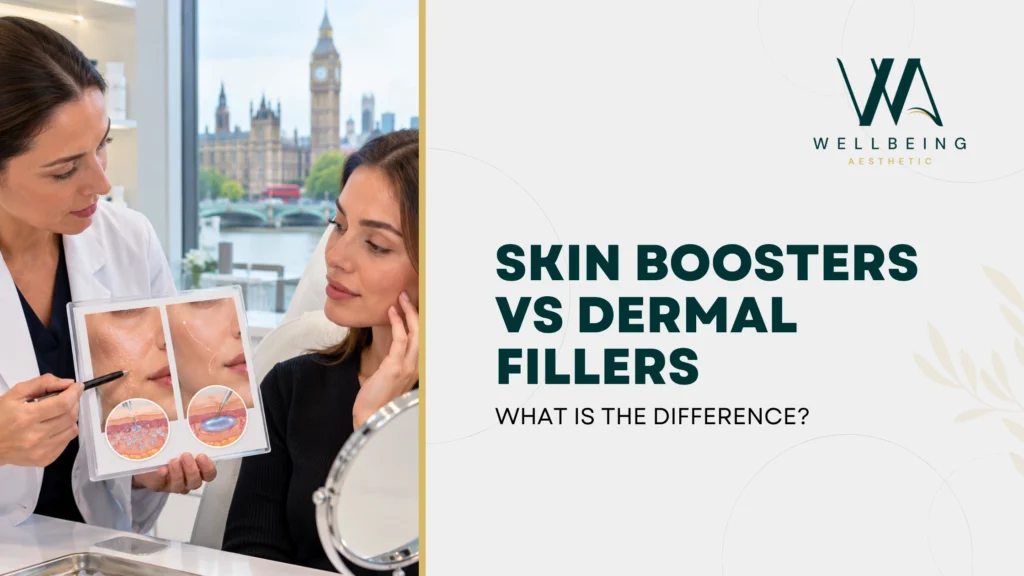
Skin Boosters vs Dermal Fillers: What Is the Difference? Standing in front of a treatment menu with “skin booster” and “dermal filler” listed one above the other is a common moment of confusion. Both use hyaluronic acid, both are delivered by injection, and both promise better looking skin, so it is easy to assume they do roughly the same job. They do not. One treatment rebuilds hydration and texture from within the skin. The other restores volume and structure that has been lost, or that was never quite there to begin with. Choosing the wrong one for your concern is one of the most common reasons people feel disappointed with a treatment, not because it failed, but because it was never designed to solve that particular problem. This guide sets out how skin boosters and dermal fillers differ, what each does beneath the skin, how their costs and results compare, and whether the two can be combined. You can see both sit alongside the rest of the aesthetic treatments available at Wellbeing Aesthetic’s Croydon clinic, a useful starting point before your consultation. As with any injectable treatment, none of this replaces a proper assessment. Skin type, medical history and your specific goals all affect which treatment, or combination of treatments, makes sense for you, which is why a consultation with a qualified practitioner should always come before booking either one. Key Takeaways Different jobs, same ingredient. Both treatments often use hyaluronic acid, but skin boosters hydrate the skin’s texture while dermal fillers restore lost volume and shape. Skin boosters spread, fillers hold their position. Skin boosters use a thinner, more fluid hyaluronic acid that disperses evenly, while dermal fillers use thicker, often cross linked gels designed to hold their structure. Longevity differs considerably. Skin booster results generally last around four to six months, while dermal filler results commonly last nine to eighteen months depending on the product and area treated. They are not interchangeable. A skin booster will not lift a hollow cheek, and a dermal filler is not designed to treat overall dullness or dehydration. Combining them is sometimes appropriate. Some patients benefit from a course of skin boosters alongside filler in a different area, but only when a practitioner confirms there is a genuine clinical reason for each treatment. Cost reflects the treatment, not just the product. UK skin booster sessions typically start lower than a full syringe of dermal filler, though prices vary by clinic, product and treatment area. Downtime is usually milder with skin boosters. Fillers can cause more noticeable swelling or bruising, particularly around the lips or under the eyes, while skin boosters tend to settle within a day or two. The right choice depends on your concern. Dullness and dehydration point toward a skin booster, while volume loss or contour change points toward a dermal filler, and a consultation clarifies which applies to you. What Is the Main Difference Between Skin Boosters and Dermal Fillers? The main difference comes down to purpose. Skin boosters use a thin hyaluronic acid solution, injected in small amounts across the skin, to improve hydration, texture and radiance. Dermal fillers use a thicker hyaluronic acid gel, injected at specific points, to add volume, reshape a feature or restore lost structure. This one distinction, hydration versus volume, shapes almost everything else in this guide, from the injection technique used to how long the results last and what each treatment reasonably costs. What Are Dermal Fillers and How Do They Work? Dermal fillers are gel based hyaluronic acid treatments, often cross linked so the product holds its shape rather than dispersing. A practitioner injects the gel at specific points and depths to restore volume, redefine a contour, or fill a hollow. What Are Dermal Fillers Commonly Used For? Restoring flattened or hollow cheeks Adding volume and definition to thin lips Softening nasolabial folds and marionette lines Filling tear troughs beneath the eyes Refining jawline and chin contour Results from dermal fillers generally last between nine and eighteen months, depending on the product used, the area treated and how quickly an individual’s body metabolises hyaluronic acid. Because filler results are visible almost immediately, most patients experience some swelling or bruising in the first few days. If you are considering lip filler specifically, our day by day guide to lip filler swelling stages sets out a realistic healing timeline. What Are Skin Boosters and How Do They Work? Skin boosters use a much thinner, more fluid hyaluronic acid formulation, delivered as small micro injections spread evenly across the treatment area rather than concentrated at specific points. Because the formulation disperses rather than holding a shape, skin boosters do not add volume or change a feature’s contour. Instead, the hyaluronic acid draws in and holds moisture within the dermis, gradually improving hydration, texture and radiance over several weeks. Many people describe the effect as an injectable version of a deep moisturiser, one that keeps working long after a cream would have been absorbed. Skin boosters tend to suit dull, dehydrated or tired looking skin where volume has not been lost, Skin boosters may suit people whose main concerns are dehydration, dullness, fine superficial lines or changes in overall skin quality rather than loss of facial volume. You can see the kind of subtle, gradual glow this treatment produces in the Wellbeing Aesthetic gallery, alongside results from the clinic’s other treatments. Skin Boosters vs Dermal Fillers: Full Comparison at a Glance The table below sets out how the two treatments compare across the factors that matter most when deciding between them. Factor Skin Boosters Dermal Fillers Main purpose Hydration and skin quality Volume and contour restoration Formulation Thin, low viscosity hyaluronic acid Thicker, often cross linked hyaluronic acid gel Injection technique Multiple micro injections spread evenly Targeted injections at specific points and depths Best for Dull, dehydrated or tired looking skin Hollow cheeks, thin lips, or lost structure Results timeline Builds gradually over 2 to 4 weeks Visible immediately, settles over 1 to 2
Skin Booster Treatment in Croydon, London: Benefits, Cost, Procedure, Results and Aftercare
Skin Booster Treatment in Croydon, London: Benefits, Cost, Procedure, Results and Aftercare Dull, tight, dehydrated skin does not usually respond to another serum. You can layer on hyaluronic acid moisturiser every night and still catch your reflection under office lighting and think your skin looks tired rather than tired you feel. That gap between how your skin looks and how well you are taking care of it is exactly the problem skin boosters were designed to close. Skin boosters have become one of the most requested treatments among people in their late twenties, thirties, and forties who are not chasing a dramatically different face, just a healthier looking one. They sit in an unusual space in aesthetic medicine: not a filler, not a wrinkle treatment, but a way of putting hydration back into the skin itself, at a depth no cream can reach. If you are based in Croydon or the wider South London area and searching for what a skin booster treatment actually involves, this guide covers how the treatment works, what it costs, how long results last, and what a sensible aftercare routine looks like. It also looks honestly at when a skin booster is the right call and when a different treatment, such as Profhilo or a dermal filler, might serve you better. None of these replaces a proper consultation. Skin type, medical history, and goals all affect whether skin boosters are the right starting point, which is why every treatment plan at a medically led clinic should begin with an assessment rather than a menu. Key Takeaways Skin boosters treat hydration, not volume. They use micro injections of hyaluronic acid to improve texture and radiance, unlike dermal fillers, which restore lost volume and contour. Results build gradually. Most people notice improved hydration and glow over two to four weeks, not immediately after the appointment. A course works better than a single session. Clinics typically recommend two to three initial sessions spaced several weeks apart, followed by maintenance roughly every four to six months. Downtime is minimal for most people. Mild redness or small bumps at injection points usually settle within a day or two, though bruising is possible. Pricing varies depending on product and location. UK skin booster sessions generally fall between £150 and £450, with London clinics often at the higher end of that range. They are not the same as Profhilo. Skin boosters use lower concentration hyaluronic acid to spread across a wider area, while Profhilo uses a small number of higher concentration injection points to stimulate collagen. Aftercare protects your results. Avoiding makeup, saunas, and strenuous exercise for around 24 hours helps reduce irritation and supports even product distribution. Not everyone is a suitable candidate. Pregnancy, breastfeeding, active skin infections, and certain medical conditions typically mean postponing or avoiding treatment until a practitioner confirms it is appropriate. What Are Skin Boosters? Skin boosters are injectable hyaluronic acid treatments designed to hydrate the skin from within rather than add volume or shape. A practitioner delivers a series of fine micro injections across the treatment area, most often the face, neck, or hands, placing the product just beneath the skin surface where it draws in and holds moisture. Because the formulation is thinner than a typical dermal filler, skin boosters spread evenly through the skin rather than sitting in one spot. That is what makes them suited to overall skin quality rather than to reshaping a specific feature. Many people describe the effect as an injectable version of a deep moisturiser, one that keeps working long after a topical product would have been absorbed and washed away. You can find a summary of skin boosters alongside Wellbeing Aesthetic’s other treatments, including how they compare to Profhilo and dermal fillers on the same page. How Do Skin Boosters Work? Hyaluronic acid occurs naturally in the skin but declines with age, sun exposure, and general wear. Skin boosters replenish that supply directly in the dermis, where the molecule binds to water and gradually plumps into the surrounding tissue. Over several weeks, many patients also see a modest improvement in skin elasticity, since better hydrated skin tends to support its own structure more effectively. What Are the Benefits of Skin Booster Treatment? Skin boosters are most valued for the improvements they bring to skin quality rather than shape. Reported benefits typically include: Noticeably improved hydration and a healthier, less dull complexion Smoother skin texture and a reduction in the appearance of fine, superficial lines A subtle increase in elasticity and firmness as hydration levels improve A more even, radiant look often described as a natural glow rather than an obvious change Suitability for areas that do not need volume, such as under the eyes, the neck, or the backs of the hands These are realistic, gradual outcomes rather than dramatic transformations. Anyone expecting the kind of change associated with dermal fillers is usually better served by a different treatment, or a combination of approach agreed during a consultation. If dehydrated, tired looking skin is your main concern, it’s worth seeing how skin boosters sit alongside Wellbeing Aesthetic’s full range of aesthetic treatments in Croydon before deciding what to book. Skin Boosters vs Dermal Fillers vs Profhilo: What Is the Difference? These three injectable treatments are frequently confused because they all use hyaluronic acid, yet they solve different problems. The table below sets out how they compare. Treatment Main Purpose Typical Results Last Best For Skin Boosters Deep hydration and improved skin texture 4 to 6 months Dull, dehydrated, or tired looking skin without volume loss Dermal Fillers Restoring lost volume and contour 9 to 18 months Hollowed cheeks, thinning lips, or lost facial structure Profhilo Bio remodeling and collagen stimulation 6 to 12 months Overall skin laxity and quality across the face, neck, or hands What Happens During a Skin Booster Treatment in Croydon? A skin booster appointment follows a consistent structure, though the number of injection points and total treatment time depends on the area covered.
ExoSmart Regenerative Therapy: The Complete Treatment Process Explained
ExoSmart Regenerative Therapy: The Complete Treatment Process Explained If you have been exploring regenerative treatments for skin rejuvenation, hair restoration, or tissue repair, you may have come across ExoSmart – a newer approach that takes the science of PRP one significant step further. Unlike traditional PRP, which concentrates platelets from just one fraction of your blood, ExoSmart processes your entire plasma – capturing a broader range of growth factors, extracellular vesicles, and exosomes that standard PRP leaves behind. The result is a more complete regenerative concentrate, produced from your own blood, processed at point of care, and delivered fresh on the same day. This guide explains exactly how ExoSmart works, what happens during the treatment from first blood draw to final injection, and what makes its technology different from the PRP protocols most clinics currently offer. What Is ExoSmart? ExoSmart is a CE-MDR-certified medical device and processing system designed to produce a concentrated regenerative product from a patient’s own blood. It is used in regenerative medicine and aesthetic treatments including skin rejuvenation, hair restoration, and tissue repair. CE-MDR certification means the device has been independently assessed and approved as a medical device under the EU Medical Device Regulation – one of the most stringent regulatory frameworks in the world for this category of equipment. This is not a cosmetic device; it is a medically regulated system. The key distinction from standard PRP is what ExoSmart concentrates. Rather than isolating platelets from one fraction of the blood, ExoSmart processes the complete plasma – retaining not just platelets but the full plasma secretome: growth factors, extracellular vesicles, and exosomes that sit across both the platelet-rich and platelet-poor fractions of your blood. The treatment is autologous, meaning it uses your own blood with no synthetic additives, foreign substances, or external growth factors introduced into the process. The Science: What Makes ExoSmart Different? To understand why ExoSmart represents a step forward from standard PRP, it helps to understand what standard PRP discards. What standard PRP does A conventional PRP treatment draws blood, spins it in a centrifuge to separate the layers, and collects the platelet-rich plasma (PRP) fraction – the layer that contains a high concentration of platelets and their associated growth factors. The platelet-poor plasma (PPP) – the remaining plasma once the platelets are removed – is typically discarded. That is where the problem lies. A significant proportion of the circulating extracellular vesicles (EVs) and soluble growth factors in your blood – including exosomes – sit in the platelet-poor fraction. Standard PRP removes this fraction and throws it away. What ExoSmart does differently ExoSmart combines both fractions – the PRP and the PPP – and processes them together. The combined plasma (roughly 25 to 30 ml) passes through a precision ultrafiltration cartridge: 870 hollow fibres arranged in a cylinder, with a 15 kDa membrane cutoff. The flow moves tangentially across the fibres – not straight through them. Anything smaller than 15 kDa (primarily water and salt) passes out of the cartridge as filtrate. Everything larger – growth factors, extracellular vesicles including exosomes, platelets, fibrin, and plasma proteins – stays in the retentate. What comes out is approximately 6 to 7 ml of concentrated autologous secretome: the complete active biology of your plasma, not just the platelet fraction. The tangential flow serves a second purpose beyond concentration. The mechanical shear it generates activates a substantial portion of the platelets through a process called mechanotransduction – without the need for calcium chloride, thrombin, or any chemical activation agent. This means you get immediate soluble-cargo release from activated platelets, plus an intact platelet fraction that continues releasing after injection. In short: ExoSmart delivers the complete secretome – the vesicles, the growth factors, and the activated platelets – in one 6 to 7 ml dose, from your own blood, ready to inject. The ExoSmart Treatment Process: Step by Step One of the practical advantages of ExoSmart is how cleanly it fits into a standard clinic appointment. The full workflow – from blood draw to injection – runs between 20 and 30 minutes. Here is what happens at each stage. Step 1 – Consultation and Assessment Before any blood is drawn, your practitioner conducts a thorough consultation. This covers your medical history, any medications you are taking (particularly NSAIDs or blood thinners), your treatment goals, and an assessment of the target area – whether that is your skin, scalp, or another site. At Wellbeing Aesthetic, no treatment begins without this assessment. Understanding your health and your goals is not a formality; it determines whether ExoSmart is the right choice for you, and if so, exactly how it should be delivered. Step 2 – Blood Draw Approximately 60 ml of blood is drawn from your arm using a standard venepuncture technique, collected into tubes containing ACD (Acid Citrate Dextrose) – an anticoagulant solution that prevents clotting during processing. To put this in context: 60 ml represents roughly 1.2 percent of your total blood volume. This is comparable to a standard blood test and well within the range your body handles without any physiological effect. Most patients report minimal discomfort at this stage – no different from routine bloodwork. Step 3 – Centrifugation The collected blood is placed in a centrifuge – any validated PRP centrifuge already used in the clinic will work; ExoSmart is not tied to proprietary spinning hardware. The spin separates the blood into its component layers and isolates the plasma. The key difference from standard PRP at this stage: rather than selecting only the platelet-rich fraction, ExoSmart uses both the PRP and the PPP. Both fractions are combined, giving approximately 25 to 30 ml of whole plasma to process. Step 4 – Ultrafiltration This is the step that makes ExoSmart distinct from every standard PRP protocol. The combined plasma goes into the ExoSmart device – a compact unit approximately the size of a large syringe barrel, held in the hand. There is no pump, no power source, no cold chain required. The practitioner pushes the
Lip Filler Swelling Stages: A Day-by-Day Healing Timeline and Recovery Guide
Lip Filler Swelling Stages: A Day-by-Day Healing Timeline and Recovery Guide Swelling is one of the most common concerns people have after getting lip fillers. Your lips may initially look larger, firmer or less even than expected, particularly during the first few days. At Wellbeing Aesthetic, lip filler treatments are carefully planned to enhance your natural lip shape while maintaining facial balance. Our practitioners also provide clear aftercare guidance, so you know what to expect throughout each stage of recovery. In most cases, swelling is a normal part of the healing process and does not reflect your results. Lip filler swelling is usually most noticeable during the first 24 to 48 hours before gradually settling over the following days. Why Do Lips Swell After Filler? Anti-wrinkle injections use a Lip fillers commonly contain hyaluronic acid, a gel-like substance used to enhance volume, definition, shape, or symmetry. During treatment, the practitioner places the filler into selected areas of the lips using a needle or cannula. Even when the procedure is performed carefully, the injections create minor tissue trauma. Your body responds by increasing blood flow and sending fluid to the treated area, resulting in temporary swelling. Hyaluronic acids can also attract and retain water. This may make the lips look fuller during the early healing period than they will once the product has settled. The swelling you see immediately after treatment therefore comes from a combination of: The filler itself Temporary inflammation Fluid retention Minor tissue trauma The effects of any an aesthetic used Possible bruising around injection points Lip Filler Swelling Stages Day by Day Day 0: Immediately After Your Lip Filler Treatment Your lips will usually appear fuller as soon as the treatment is complete. However, some of this volume will be caused by immediate swelling rather than the filler alone. You may notice: Puffy or enlarged lips Mild redness around injection points Tenderness or sensitivity A tight or firm sensation Temporary numbness from an aesthetic Tiny spots of blood at injection sites Slight unevenness between different areas Your lips may initially look smooth and well-defined, but swelling can continue developing over the next several hours. During this stage, avoid repeatedly touching or pressing the treated area. Only massage your lips when your practitioner has specifically instructed you to do so. Day 1: Swelling May Reach Its Peak For many patients, the morning after treatment is when their lips look most swollen. The upper lip may appear particularly prominent, and one side might temporarily look larger than the other. Your lips may also feel tight, tender, or slightly uncomfortable when eating, smiling, or speaking. This can feel worrying, especially when your lips look much larger than the result you requested. However, early swelling can significantly exaggerate both volume and asymmetry. Swelling commonly peaks within the first one to two days before gradually reducing. Both competitor recovery guides reviewed for this article describe the first 24 to 48 hours as the most noticeable stage of swelling. Continue following the aftercare instructions provided by your practitioner and monitor whether symptoms remain stable or begin improving. Day 2: Puffiness and Tenderness Continue On the second day, your lips may still feel swollen and sensitive. Bruising can also become more visible because it sometimes takes time for discolouration to appear at the surface. Common experiences during this stage include: Continued puffiness Mild throbbing or tenderness Blue, purple or yellow bruising Temporary unevenness A firm or slightly lumpy texture Dryness or tightness Small areas can swell differently, so the lips may not look perfectly symmetrical. This does not necessarily mean the filler has been placed unevenly. Significant or rapid worsening of pain, however, should not be dismissed as normal swelling. Day 3: Swelling Should Start Settling By the third day, many people begin to notice that the initial puffiness is reducing. Your lips might still look larger than the intended result, but the natural border, cupid bow and overall proportions should slowly become easier to see. Bruising may still be present and can sometimes look darker before it fades. The lips may also feel firmer than usual because the filler is still integrating with the surrounding tissue. Avoid analyzing small differences too closely at this point. The lips are still healing, and their appearance can change between morning and evening. Days 4 to 5: The Shape Becomes Clearer During days four and five, most people notice a more obvious improvement. Typical changes include: Reduced puffiness Less tenderness Fading bruises Improved symmetry A softer texture Greater definition around the lip border Your lips should begin looking closer to the planned result, although a small amount of swelling may remain. If the lips are still mildly uneven, allow additional time before assuming that correction is necessary. Days 6 to 7: Most Visible Swelling Has Reduced By the end of the first week, much of the noticeable swelling has usually been resolved. The lips should feel more comfortable during normal activities, and any remaining bruising should continue fading. You may still notice minor firmness, dryness, or localized puffiness. This is often the stage when people begin to feel more confident about their results. Nevertheless, it is still too early to make a final judgement or request an additional filler. Days 8 to 14: The Filler Continues to Settle During the second week, residual swelling should continue decreasing, allowing the lips to feel softer and more natural. At this stage: The treated area should feel less tender Minor lumps caused by swelling may soften Bruising should be significantly reduced The final shape becomes easier to assess Temporary asymmetry should improve Many practitioners arrange a review at around two weeks because the early swelling has usually settled enough to assess the result more accurately. If a firm lump, marked unevenness or persistent tenderness remains, contact your treating practitioner rather than trying to manipulate the filler yourself. Weeks 2 to 4: Assessing the Result Although many people look and feel healed after two weeks, lip fillers can continue integrating
Anti-Wrinkle Treatment in London: Benefits, Procedure, Cost & How to Choose the Right Clinic
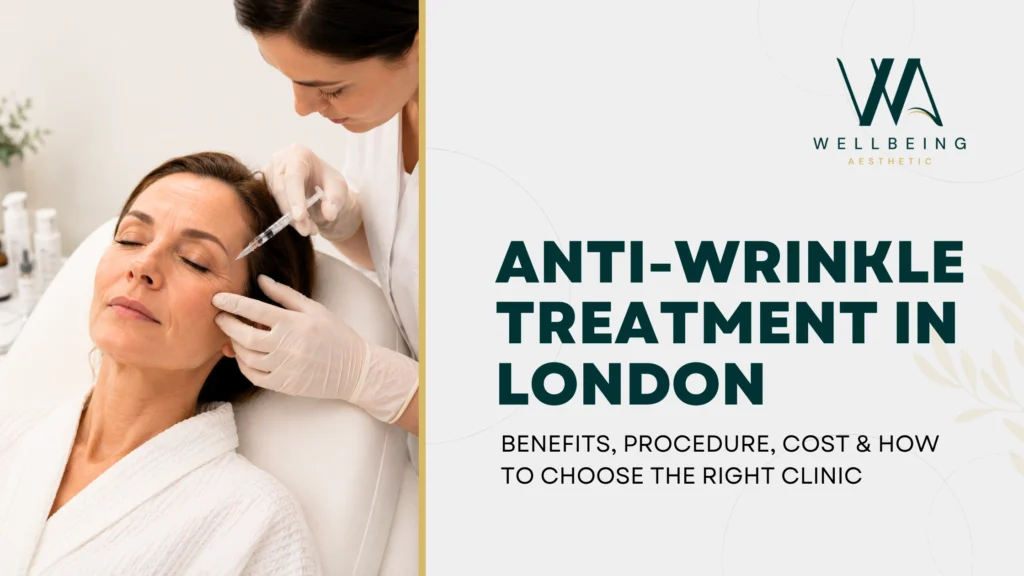
Anti-Wrinkle Treatment in London: Benefits, Procedure, Cost & How to Choose the Right Clinic Anti-wrinkle injections have quietly become one of the most requested aesthetic treatments in London – but the experience varies enormously from one clinic to the next. Prices differ by hundreds of pounds for the same procedure. Practitioner qualifications range from GMC-registered doctors to weekend-trained beauty therapists. And what you see advertised as “£99 Botox” is rarely the treatment a medically led clinic would ever offer. If you’re considering anti-wrinkle treatment in Croydon, London, this guide will walk you through what the procedure actually involves, the real benefits (and honest limitations), what you should expect to pay in 2026, and – most importantly – how to identify a clinic you can safely trust with your face. What Are Anti-Wrinkle Injections? Anti-wrinkle injections use a highly purified form of botulinum toxin – most known by brand names such as Botox, Azzalure, and Bocouture – to temporarily relax the small facial muscles responsible for dynamic wrinkles. These are the lines that appear when you frown, squint, smile, or raise your eyebrows. Unlike dermal fillers, which add volume to the skin, anti-wrinkle injections work on the muscle underneath. When the muscle stops contracting forcefully, the skin above it smooths out over the following one to two weeks. It’s a subtle, targeted treatment – not a “face freeze.” The most treated areas are: Forehead lines – horizontal lines across the forehead Frown lines (glabellar lines) – the vertical “11s” between the eyebrows Crow’s feet – the fine lines that fan out from the outer corners of the eyes Bunny lines – small wrinkles across the bridge of the nose Chin dimpling – pebble-like texture on the chin Jawline slimming and masseter treatment – for teeth grinding or a softer jawline Because botulinum toxin is a prescription-only medicine in the UK, it can only be legally prescribed after a face-to-face consultation with a qualified prescriber – never sold or administered without one. The Benefits of Anti-Wrinkle Treatment 1. Softer, smoother skin without surgery. The most visible benefit is a genuine reduction in the appearance of dynamic wrinkles, giving the face a rested, refreshed look – without an operation, general an aesthetic, or recovery time. 2. Prevention as well as corrections. A growing number of patients in their late twenties and thirties now choose “preventative” anti-wrinkle treatment. Regular, low-dose injections can slow down the formation of deep, set-in expression lines before they take hold, which is often far easier than trying to soften them once they’ve developed. 3. Minimal downtime. Most patients return to their normal day immediately after treatment. Small red bumps at the injection sites usually settle within a couple of hours. 4. A quick appointment. The treatment itself typically takes 15-20 minutes, making it easy to fit around a working day or lunch break. 5. Natural-looking results – when performed skillfully. A medically trained injector will assess how your individual facial muscles move before deciding on dose and injection points, aiming to soften wrinkles while preserving your natural expression. Done well, no one should be able to tell you have had anything done – only that you look well-rested. 6. More than cosmetics. Anti-wrinkle injections are also clinically used to treat teeth grinding (bruxism), tension headaches, jaw pain, and excessive underarm sweating (hyperhidrosis). 7. A quiet confidence boost. For many patients, the real value isn’t dramatic about transformation – it’s feeling less self-conscious in photos, in video calls, or when they simply catch their own reflection. The Procedure: What to Expect, Step by Step A responsible, medically led clinic follows a set process – not a quick in-and-out injection. Here’s what a proper anti-wrinkle appointment should look like. 1. The Consultation Every treatment should begin with a proper consultation. Your practitioner should review your medical history, discuss your goals honestly, examine your facial muscle movement, and explain what the treatment can – and cannot – realistically achieve. A good consultation should feel informative, not sales driven. If it doesn’t, walk away. At Wellbeing Aesthetic, every new patient begins with a free, no-obligation consultation with our medical team, so you have time to ask questions and understand your options before committing anything. 2. The Treatment The area is cleansed, and a series of very fine injections are administered directly into the targeted muscles. Most patients describe the sensation as a quick pinch rather than pain – not an aesthetic is usually needed. The whole process takes around 15-20 minutes. 3. Immediately Afterwards You may notice tiny red bumps at the injection sites, which typically settle within an hour or two. Standard aftercare advice includes: Avoid touching, massaging, or applying pressure to the treated area for at least 24 hours Avoid strenuous exercise for the rest of the day Stay upright for four hours after treatment Skip saunas, steam rooms, and sunbeds for 48 hours 4. Waiting for Results This is where patience matters. Initial changes often become visible within 3-7 days, but the full effect takes 10-14 days to develop. Never book an anti-wrinkle appointment for the week of a wedding, big event, or important photograph – always leave a buffer of at least two weeks. 5. Follow-Up and Review Reputable clinics offer a follow-up review, usually around the two-week mark, to check your results and make any small dose adjustments if needed. If a clinic doesn’t offer this as standard, ask why. How Long Do the Results Last? Anti-wrinkle results typically last three to four months, though this depends on your metabolism, muscle strength, the area treated, and the dose used. Most patients settle into a comfortable routine of maintenance treatments every three to four months. How Much Does Anti-Wrinkle Treatment Cost in London? Anti-wrinkle pricing in London is not one number – it’s a range that depends on where in London, you’re being treated, who’s holding the needle, and what you’re getting for the price. Typical 2026 pricing for a medically led London clinic: One area (e.g. frown
Acne Face Mapping: What Your Breakouts Say About Your Health (Complete Guide)
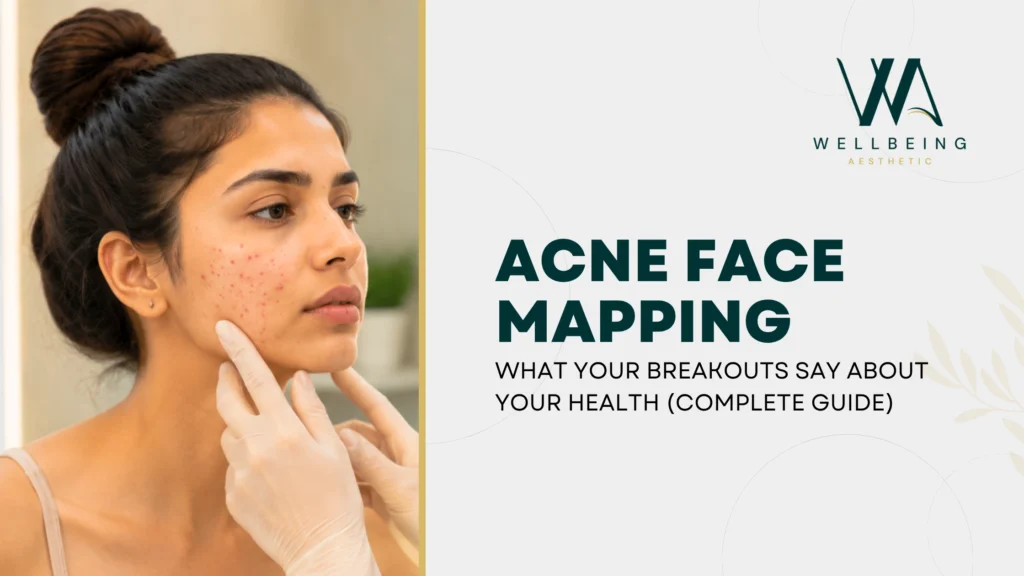
Acne Face Mapping: What Your Breakouts Say About Your Health (Complete Guide) You cleanse twice a day. You never skip SPF. You drink water, yet your skin keeps breaking out in the same spots. If that sounds familiar, your breakouts might be trying to tell you something. Acne face mapping is an ancient practice, rooted in traditional Chinese medicine (TCM) and Ayurveda, that links breakout locations on your face to specific organs and internal systems. While it is not a diagnostic tool, it offers a fascinating framework for understanding why your skin behaves the way it does – and what it might be reacting to beneath the surface. In this complete guide, we break down every zone of the face map, what recurring breakouts in each area might signal, and what you can do about it – from lifestyle changes to professional treatments available at Wellbeing Aesthetic in Croydon. What Is Acne Face Mapping? Face mapping is the practice of connecting specific regions of the face to internal organs and body systems. The idea originates from traditional Chinese and Ayurvedic medicine, where practitioners used facial observations as a diagnostic window into overall health. In modern aesthetics, face mapping has been adapted as a complementary tool – not a replacement for medical diagnosis, but a useful lens for identifying patterns. When you consistently break out in the same area, it is worth considering whether something internal is contributing alongside external triggers like skincare products, pollution, or stress. The Acne Face Map Breakdown: What Each Area Means Zone Face Area Possible Internal Link Zone 1 & 2 Forehead Digestive system, bladder, small intestine Zone 3 Between the brows Liver Zone 4 & 5 Ears & temples Kidneys Zone 6 Nose Heart & blood pressure Zone 7 & 8 Cheeks Lungs, stomach, liver Zone 9 & 10 Jawline & chin Hormones, reproductive organs Zone 11 Neck & chest Hormones, stress Zone 1 & 2: Forehead – Digestive System & Bladder What It Looks Like Small pustules or congested pores scattered across the upper forehead, often appearing in clusters or as a persistent rough texture rather than individual inflamed spots. What It May Indicate In face mapping tradition, the forehead is linked to the small intestine and bladder. Breakouts here are frequently associated with: Poor digestion or a diet high in processed foods and refined sugars Inadequate water intake – the bladder connection suggests dehydration may be a factor Disrupted sleep patterns, which affect cortisol and digestive rhythm Stress, which slows gut motility and increases intestinal permeability What to Try Increase water intake to at least 2 liters per day Reduce processed food and focus on whole, fibre-rich meals Establish a consistent sleep schedule Consider a gentle scalp and hairline cleanse if you use heavy hair products – product residue along the hairline is a very common external trigger in this zone Zone 3: Between the Eyebrows – The Liver What It Looks Like Deep, often painful spots nestled in the glabella area – the space between your eyebrows. These can be stubborn and slow to resolve. What It May Indicate This zone is classically linked to liver function. While the liver is one of the body’s primary detox organs, it can become overburdened by: Excessive alcohol consumption A diet rich in fatty, oily, or processed food Certain medications that place a higher load on the liver Food sensitivities, particularly dairy or gluten in sensitive individuals What to Try Cut back on alcohol and add liver-supportive foods like leafy greens, beetroot, and lemon water Identify and eliminate potential food triggers through an elimination diet (with guidance from a nutritionist) Avoid squeezing or picking spots in this zone – the between-brow area is highly vascularized and scarring is common Zone 4 & 5: Ears & Temples – Kidneys What It Looks Like Breakouts along the hairline near the temples, around the ears, or on the sides of the forehead. These can feel tender and often appear as deeper under-the-skin bumps. What It May Indicate The temples and ear area are associated with the kidneys in face mapping tradition. Kidney-linked breakouts may point to: Excessive caffeine intake – coffee, energy drinks, and strong tea can dehydrate and stress the kidneys High sodium consumption, which increases kidney filtration load Chronic dehydration Possible food sensitivities What to Try Reduce caffeine and replace with herbal teas or water Monitor salt intake and opt for natural, whole foods over packaged alternatives Ensure consistent hydration throughout the day, not just in the morning Externally, check whether your phone screen is clean – the temple area has direct contact with your phone during calls, which transfers bacteria directly to the skin Zone 6: Nose – Heart & Blood Pressure What It Looks Like Enlarged pores on the nose, blackheads, or oily congestion are extremely common here. Inflamed spots on the nose itself are less frequent but do occur. What It May Indicate In traditional face mapping, the nose corresponds to the heart and circulatory system. Breakouts in this area may be linked to: High blood pressure A diet high in saturated fat or spicy foods Vitamin B deficiency Skin conditions like rosacea, which has a cardiovascular inflammatory component What to Try Limit spicy, greasy, and heavily processed foods Incorporate heart-healthy foods – oily fish, nuts, avocado, and olive oil Use non-comedogenic skincare products specifically formulated for the T-zone For persistent nose congestion and visible pores, professional facials or skin booster treatments can significantly improve skin texture in this area Zone 7 & 8: Cheeks – Lungs, Stomach & Liver What It Looks Like Breakouts across the mid-cheek area, ranging from fine texture bumps to larger inflamed spots. Cheek acne is one of the most common complaints and can be either left-sided, right-sided, or symmetrical. What It May Indicate The cheeks are mapped to the lungs and stomach in traditional face mapping. In modern interpretation, cheek acne may be linked to: Poor air quality or exposure to pollution – particularly relevant in