

Lip Filler Swelling Stages: A Day-by-Day Healing Timeline and Recovery Guide
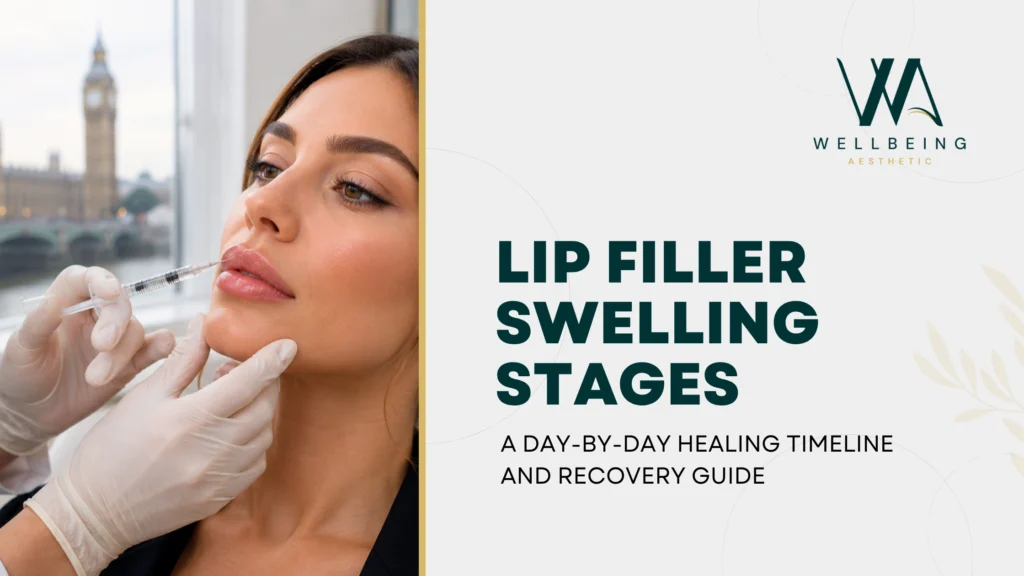
Lip Filler Swelling Stages: A Day-by-Day Healing Timeline and Recovery Guide Swelling is one of the most common concerns people have after getting lip fillers. Your lips may initially look larger, firmer or less even than expected, particularly during the first few days. At Wellbeing Aesthetic, lip filler treatments are carefully planned to enhance your natural lip shape while maintaining facial balance. Our practitioners also provide clear aftercare guidance, so you know what to expect throughout each stage of recovery. In most cases, swelling is a normal part of the healing process and does not reflect your results. Lip filler swelling is usually most noticeable during the first 24 to 48 hours before gradually settling over the following days. Why Do Lips Swell After Filler? Anti-wrinkle injections use a Lip fillers commonly contain hyaluronic acid, a gel-like substance used to enhance volume, definition, shape, or symmetry. During treatment, the practitioner places the filler into selected areas of the lips using a needle or cannula. Even when the procedure is performed carefully, the injections create minor tissue trauma. Your body responds by increasing blood flow and sending fluid to the treated area, resulting in temporary swelling. Hyaluronic acids can also attract and retain water. This may make the lips look fuller during the early healing period than they will once the product has settled. The swelling you see immediately after treatment therefore comes from a combination of: The filler itself Temporary inflammation Fluid retention Minor tissue trauma The effects of any an aesthetic used Possible bruising around injection points Lip Filler Swelling Stages Day by Day Day 0: Immediately After Your Lip Filler Treatment Your lips will usually appear fuller as soon as the treatment is complete. However, some of this volume will be caused by immediate swelling rather than the filler alone. You may notice: Puffy or enlarged lips Mild redness around injection points Tenderness or sensitivity A tight or firm sensation Temporary numbness from an aesthetic Tiny spots of blood at injection sites Slight unevenness between different areas Your lips may initially look smooth and well-defined, but swelling can continue developing over the next several hours. During this stage, avoid repeatedly touching or pressing the treated area. Only massage your lips when your practitioner has specifically instructed you to do so. Day 1: Swelling May Reach Its Peak For many patients, the morning after treatment is when their lips look most swollen. The upper lip may appear particularly prominent, and one side might temporarily look larger than the other. Your lips may also feel tight, tender, or slightly uncomfortable when eating, smiling, or speaking. This can feel worrying, especially when your lips look much larger than the result you requested. However, early swelling can significantly exaggerate both volume and asymmetry. Swelling commonly peaks within the first one to two days before gradually reducing. Both competitor recovery guides reviewed for this article describe the first 24 to 48 hours as the most noticeable stage of swelling. Continue following the aftercare instructions provided by your practitioner and monitor whether symptoms remain stable or begin improving. Day 2: Puffiness and Tenderness Continue On the second day, your lips may still feel swollen and sensitive. Bruising can also become more visible because it sometimes takes time for discolouration to appear at the surface. Common experiences during this stage include: Continued puffiness Mild throbbing or tenderness Blue, purple or yellow bruising Temporary unevenness A firm or slightly lumpy texture Dryness or tightness Small areas can swell differently, so the lips may not look perfectly symmetrical. This does not necessarily mean the filler has been placed unevenly. Significant or rapid worsening of pain, however, should not be dismissed as normal swelling. Day 3: Swelling Should Start Settling By the third day, many people begin to notice that the initial puffiness is reducing. Your lips might still look larger than the intended result, but the natural border, cupid bow and overall proportions should slowly become easier to see. Bruising may still be present and can sometimes look darker before it fades. The lips may also feel firmer than usual because the filler is still integrating with the surrounding tissue. Avoid analyzing small differences too closely at this point. The lips are still healing, and their appearance can change between morning and evening. Days 4 to 5: The Shape Becomes Clearer During days four and five, most people notice a more obvious improvement. Typical changes include: Reduced puffiness Less tenderness Fading bruises Improved symmetry A softer texture Greater definition around the lip border Your lips should begin looking closer to the planned result, although a small amount of swelling may remain. If the lips are still mildly uneven, allow additional time before assuming that correction is necessary. Days 6 to 7: Most Visible Swelling Has Reduced By the end of the first week, much of the noticeable swelling has usually been resolved. The lips should feel more comfortable during normal activities, and any remaining bruising should continue fading. You may still notice minor firmness, dryness, or localized puffiness. This is often the stage when people begin to feel more confident about their results. Nevertheless, it is still too early to make a final judgement or request an additional filler. Days 8 to 14: The Filler Continues to Settle During the second week, residual swelling should continue decreasing, allowing the lips to feel softer and more natural. At this stage: The treated area should feel less tender Minor lumps caused by swelling may soften Bruising should be significantly reduced The final shape becomes easier to assess Temporary asymmetry should improve Many practitioners arrange a review at around two weeks because the early swelling has usually settled enough to assess the result more accurately. If a firm lump, marked unevenness or persistent tenderness remains, contact your treating practitioner rather than trying to manipulate the filler yourself. Weeks 2 to 4: Assessing the Result Although many people look and feel healed after two weeks, lip fillers can continue integrating
Anti-Wrinkle Treatment in London: Benefits, Procedure, Cost & How to Choose the Right Clinic
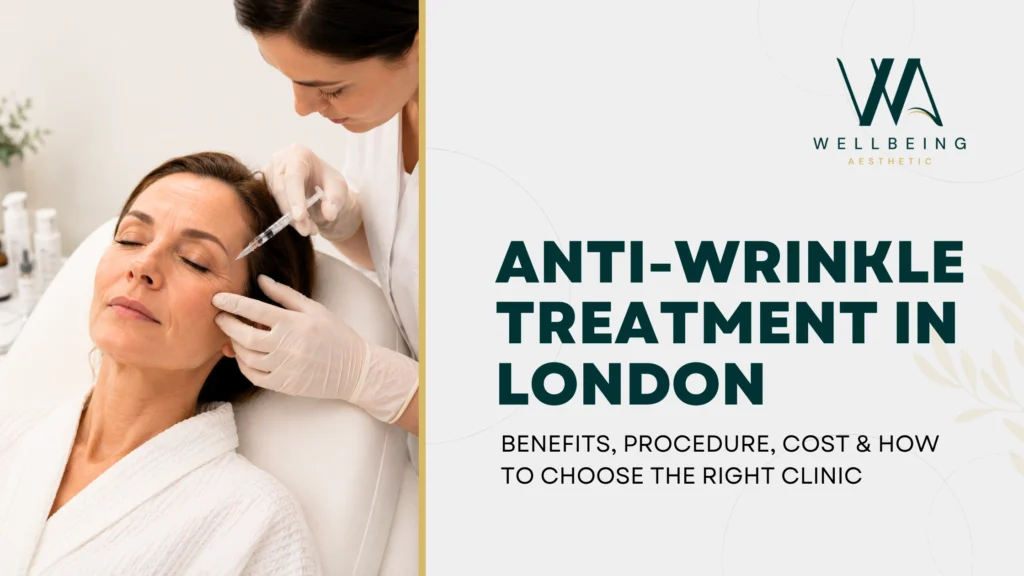
Anti-Wrinkle Treatment in London: Benefits, Procedure, Cost & How to Choose the Right Clinic Anti-wrinkle injections have quietly become one of the most requested aesthetic treatments in London – but the experience varies enormously from one clinic to the next. Prices differ by hundreds of pounds for the same procedure. Practitioner qualifications range from GMC-registered doctors to weekend-trained beauty therapists. And what you see advertised as “£99 Botox” is rarely the treatment a medically led clinic would ever offer. If you’re considering anti-wrinkle treatment in Croydon, London, this guide will walk you through what the procedure actually involves, the real benefits (and honest limitations), what you should expect to pay in 2026, and – most importantly – how to identify a clinic you can safely trust with your face. What Are Anti-Wrinkle Injections? Anti-wrinkle injections use a highly purified form of botulinum toxin – most known by brand names such as Botox, Azzalure, and Bocouture – to temporarily relax the small facial muscles responsible for dynamic wrinkles. These are the lines that appear when you frown, squint, smile, or raise your eyebrows. Unlike dermal fillers, which add volume to the skin, anti-wrinkle injections work on the muscle underneath. When the muscle stops contracting forcefully, the skin above it smooths out over the following one to two weeks. It’s a subtle, targeted treatment – not a “face freeze.” The most treated areas are: Forehead lines – horizontal lines across the forehead Frown lines (glabellar lines) – the vertical “11s” between the eyebrows Crow’s feet – the fine lines that fan out from the outer corners of the eyes Bunny lines – small wrinkles across the bridge of the nose Chin dimpling – pebble-like texture on the chin Jawline slimming and masseter treatment – for teeth grinding or a softer jawline Because botulinum toxin is a prescription-only medicine in the UK, it can only be legally prescribed after a face-to-face consultation with a qualified prescriber – never sold or administered without one. The Benefits of Anti-Wrinkle Treatment 1. Softer, smoother skin without surgery. The most visible benefit is a genuine reduction in the appearance of dynamic wrinkles, giving the face a rested, refreshed look – without an operation, general an aesthetic, or recovery time. 2. Prevention as well as corrections. A growing number of patients in their late twenties and thirties now choose “preventative” anti-wrinkle treatment. Regular, low-dose injections can slow down the formation of deep, set-in expression lines before they take hold, which is often far easier than trying to soften them once they’ve developed. 3. Minimal downtime. Most patients return to their normal day immediately after treatment. Small red bumps at the injection sites usually settle within a couple of hours. 4. A quick appointment. The treatment itself typically takes 15-20 minutes, making it easy to fit around a working day or lunch break. 5. Natural-looking results – when performed skillfully. A medically trained injector will assess how your individual facial muscles move before deciding on dose and injection points, aiming to soften wrinkles while preserving your natural expression. Done well, no one should be able to tell you have had anything done – only that you look well-rested. 6. More than cosmetics. Anti-wrinkle injections are also clinically used to treat teeth grinding (bruxism), tension headaches, jaw pain, and excessive underarm sweating (hyperhidrosis). 7. A quiet confidence boost. For many patients, the real value isn’t dramatic about transformation – it’s feeling less self-conscious in photos, in video calls, or when they simply catch their own reflection. The Procedure: What to Expect, Step by Step A responsible, medically led clinic follows a set process – not a quick in-and-out injection. Here’s what a proper anti-wrinkle appointment should look like. 1. The Consultation Every treatment should begin with a proper consultation. Your practitioner should review your medical history, discuss your goals honestly, examine your facial muscle movement, and explain what the treatment can – and cannot – realistically achieve. A good consultation should feel informative, not sales driven. If it doesn’t, walk away. At Wellbeing Aesthetic, every new patient begins with a free, no-obligation consultation with our medical team, so you have time to ask questions and understand your options before committing anything. 2. The Treatment The area is cleansed, and a series of very fine injections are administered directly into the targeted muscles. Most patients describe the sensation as a quick pinch rather than pain – not an aesthetic is usually needed. The whole process takes around 15-20 minutes. 3. Immediately Afterwards You may notice tiny red bumps at the injection sites, which typically settle within an hour or two. Standard aftercare advice includes: Avoid touching, massaging, or applying pressure to the treated area for at least 24 hours Avoid strenuous exercise for the rest of the day Stay upright for four hours after treatment Skip saunas, steam rooms, and sunbeds for 48 hours 4. Waiting for Results This is where patience matters. Initial changes often become visible within 3-7 days, but the full effect takes 10-14 days to develop. Never book an anti-wrinkle appointment for the week of a wedding, big event, or important photograph – always leave a buffer of at least two weeks. 5. Follow-Up and Review Reputable clinics offer a follow-up review, usually around the two-week mark, to check your results and make any small dose adjustments if needed. If a clinic doesn’t offer this as standard, ask why. How Long Do the Results Last? Anti-wrinkle results typically last three to four months, though this depends on your metabolism, muscle strength, the area treated, and the dose used. Most patients settle into a comfortable routine of maintenance treatments every three to four months. How Much Does Anti-Wrinkle Treatment Cost in London? Anti-wrinkle pricing in London is not one number – it’s a range that depends on where in London, you’re being treated, who’s holding the needle, and what you’re getting for the price. Typical 2026 pricing for a medically led London clinic: One area (e.g. frown
Acne Face Mapping: What Your Breakouts Say About Your Health (Complete Guide)
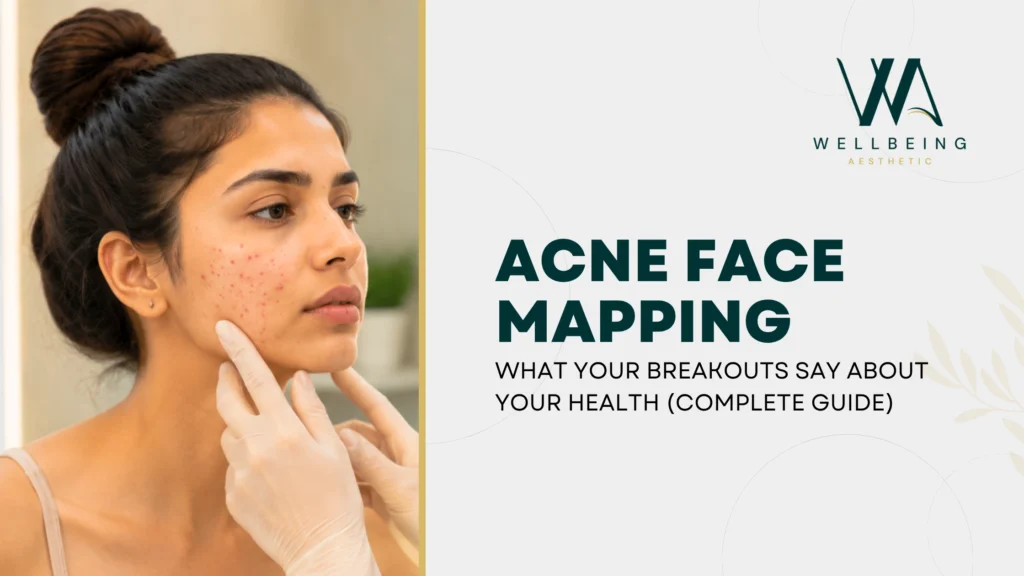
Acne Face Mapping: What Your Breakouts Say About Your Health (Complete Guide) You cleanse twice a day. You never skip SPF. You drink water, yet your skin keeps breaking out in the same spots. If that sounds familiar, your breakouts might be trying to tell you something. Acne face mapping is an ancient practice, rooted in traditional Chinese medicine (TCM) and Ayurveda, that links breakout locations on your face to specific organs and internal systems. While it is not a diagnostic tool, it offers a fascinating framework for understanding why your skin behaves the way it does – and what it might be reacting to beneath the surface. In this complete guide, we break down every zone of the face map, what recurring breakouts in each area might signal, and what you can do about it – from lifestyle changes to professional treatments available at Wellbeing Aesthetic in Croydon. What Is Acne Face Mapping? Face mapping is the practice of connecting specific regions of the face to internal organs and body systems. The idea originates from traditional Chinese and Ayurvedic medicine, where practitioners used facial observations as a diagnostic window into overall health. In modern aesthetics, face mapping has been adapted as a complementary tool – not a replacement for medical diagnosis, but a useful lens for identifying patterns. When you consistently break out in the same area, it is worth considering whether something internal is contributing alongside external triggers like skincare products, pollution, or stress. The Acne Face Map Breakdown: What Each Area Means Zone Face Area Possible Internal Link Zone 1 & 2 Forehead Digestive system, bladder, small intestine Zone 3 Between the brows Liver Zone 4 & 5 Ears & temples Kidneys Zone 6 Nose Heart & blood pressure Zone 7 & 8 Cheeks Lungs, stomach, liver Zone 9 & 10 Jawline & chin Hormones, reproductive organs Zone 11 Neck & chest Hormones, stress Zone 1 & 2: Forehead – Digestive System & Bladder What It Looks Like Small pustules or congested pores scattered across the upper forehead, often appearing in clusters or as a persistent rough texture rather than individual inflamed spots. What It May Indicate In face mapping tradition, the forehead is linked to the small intestine and bladder. Breakouts here are frequently associated with: Poor digestion or a diet high in processed foods and refined sugars Inadequate water intake – the bladder connection suggests dehydration may be a factor Disrupted sleep patterns, which affect cortisol and digestive rhythm Stress, which slows gut motility and increases intestinal permeability What to Try Increase water intake to at least 2 liters per day Reduce processed food and focus on whole, fibre-rich meals Establish a consistent sleep schedule Consider a gentle scalp and hairline cleanse if you use heavy hair products – product residue along the hairline is a very common external trigger in this zone Zone 3: Between the Eyebrows – The Liver What It Looks Like Deep, often painful spots nestled in the glabella area – the space between your eyebrows. These can be stubborn and slow to resolve. What It May Indicate This zone is classically linked to liver function. While the liver is one of the body’s primary detox organs, it can become overburdened by: Excessive alcohol consumption A diet rich in fatty, oily, or processed food Certain medications that place a higher load on the liver Food sensitivities, particularly dairy or gluten in sensitive individuals What to Try Cut back on alcohol and add liver-supportive foods like leafy greens, beetroot, and lemon water Identify and eliminate potential food triggers through an elimination diet (with guidance from a nutritionist) Avoid squeezing or picking spots in this zone – the between-brow area is highly vascularized and scarring is common Zone 4 & 5: Ears & Temples – Kidneys What It Looks Like Breakouts along the hairline near the temples, around the ears, or on the sides of the forehead. These can feel tender and often appear as deeper under-the-skin bumps. What It May Indicate The temples and ear area are associated with the kidneys in face mapping tradition. Kidney-linked breakouts may point to: Excessive caffeine intake – coffee, energy drinks, and strong tea can dehydrate and stress the kidneys High sodium consumption, which increases kidney filtration load Chronic dehydration Possible food sensitivities What to Try Reduce caffeine and replace with herbal teas or water Monitor salt intake and opt for natural, whole foods over packaged alternatives Ensure consistent hydration throughout the day, not just in the morning Externally, check whether your phone screen is clean – the temple area has direct contact with your phone during calls, which transfers bacteria directly to the skin Zone 6: Nose – Heart & Blood Pressure What It Looks Like Enlarged pores on the nose, blackheads, or oily congestion are extremely common here. Inflamed spots on the nose itself are less frequent but do occur. What It May Indicate In traditional face mapping, the nose corresponds to the heart and circulatory system. Breakouts in this area may be linked to: High blood pressure A diet high in saturated fat or spicy foods Vitamin B deficiency Skin conditions like rosacea, which has a cardiovascular inflammatory component What to Try Limit spicy, greasy, and heavily processed foods Incorporate heart-healthy foods – oily fish, nuts, avocado, and olive oil Use non-comedogenic skincare products specifically formulated for the T-zone For persistent nose congestion and visible pores, professional facials or skin booster treatments can significantly improve skin texture in this area Zone 7 & 8: Cheeks – Lungs, Stomach & Liver What It Looks Like Breakouts across the mid-cheek area, ranging from fine texture bumps to larger inflamed spots. Cheek acne is one of the most common complaints and can be either left-sided, right-sided, or symmetrical. What It May Indicate The cheeks are mapped to the lungs and stomach in traditional face mapping. In modern interpretation, cheek acne may be linked to: Poor air quality or exposure to pollution – particularly relevant in
Understanding IV Drip Therapy: What to Expect
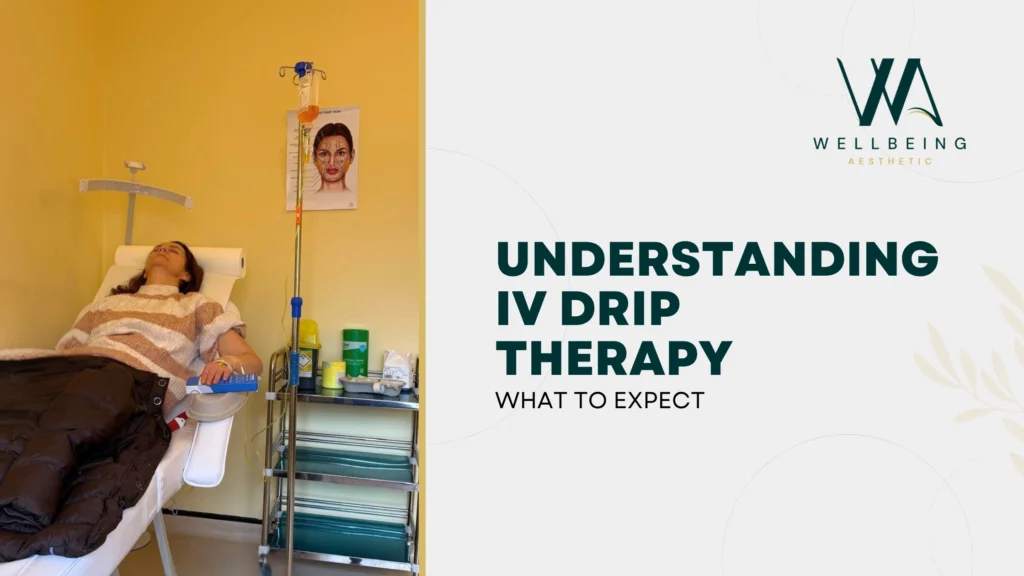
Understanding IV Drip Therapy: What to Expect IV drip therapy delivers vitamins, minerals, and fluids directly into your bloodstream — bypassing digestion entirely for faster, more complete absorption than any supplement can offer. It is one of the most effective ways to replenish your body at a cellular level, and it is now widely available at medically led clinics across the UK. At Wellbeing Aesthetic in Croydon, we offer a comprehensive menu of 12 tailored IV drip formulations — from energy and immunity boosters to skin-brightening and hair health drips — each administered by our medically trained team in a safe, clinical environment. Whether you are new to IV therapy or exploring your options, this guide walks you through everything you need to know: what goes into the drip, what a session feels like, and how to choose the right formulation for your goals. What Is IV Drip Therapy? IV stands for intravenous – meaning directly into the vein. IV drip therapy delivers a customized blend of vitamins, minerals, antioxidants, amino acids, and fluids straight into your bloodstream via a small cannula (a thin, flexible tube) inserted into a vein, usually in your arm. This is different from taking an oral supplement. When you swallow a vitamin tablet, it passes through your digestive system – and depending on your gut health, absorption rates, and the quality of the product, your body may only absorb 20-50% of the active nutrients. IV delivery bypasses the digestive system entirely, meaning nutrients reach the bloodstream at significantly higher concentrations and begin working faster. Think of it like charging your phone directly from a power socket rather than through a low-watt portable battery. The result is faster, more complete. A Brief History The medical use of IV therapy dates to the 1960s, when Dr. John Myers developed his now-famous Myers’ Cocktail – a blend of magnesium, calcium, B vitamins, and vitamin C used to treat chronic fatigue, migraines, and immune dysfunction. That formulation remains in use today, and it is one of the treatments we offer at Wellbeing Aesthetic. Over the decades, IV therapy has evolved from a hospital-only protocol to a medically supervised wellness treatment, widely used by athletes, executives, post-illness patients, and anyone seeking a meaningful boost to their health and energy. Why Choose IV Therapy Over Oral Supplements? It is a fair question. Shops are full of vitamins, protein shakes, and immune-boosting capsules – so why sit in a clinic for an IV drip? The answer comes down to bioavailability – the proportion of a nutrient that actually makes it into your bloodstream and into your cells. Here is a straightforward comparison: Factor Oral Supplements IV Drip Therapy Absorption Rate 20% to 50% (varies by gut health) Up to 100% (direct to bloodstream) Speed of Effect Hours to days During or immediately after the session Dose Possible Limited by digestive tolerance Medical grade, higher doses Personalization Fixed formulation Tailored to your goals and health Suitable For General daily wellness Targeted health goals, deficiencies, and recovery For people with compromised digestion, high physical demands, specific health goals (such as skin brightening or immune support), or simply a busy life that leaves no room for sluggish recovery, IV drip therapy offers results that supplements alone often cannot match. What Conditions and Goals Can IV Drips Help With? IV drip therapy is not a medical treatment for diagnosed conditions – it is a medically supervised wellness service. That said, it can provide meaningful support across a wide range of health and lifestyle goals: Energy and fatigue: B vitamins, magnesium, and amino acids support cellular energy production, helping to reduce the kind of exhaustion that a good night’s sleep just does not seem to fix. Immune support: High-dose vitamin C, zinc, and antioxidants can prime the immune system before traveling, during a particularly demanding period, or when recovery from illness is slow. Skin brightness and clarity: Glutathione – a master antioxidant – combined with vitamin C reduces oxidative stress, supports skin cell turnover, and can visibly brighten the complexion over a course of sessions. Hydration and recovery: After illness, intense exercise, travel, or a particularly indulgent evening, a hydration drip rapidly restores fluid balance and electrolytes that no sports drink can replicate at the same speed. Weight management support: Certain formulations include compounds that support metabolic function, fat oxidation, and detoxification – though this works alongside, not instead of, a healthy diet and activity level. Hair health: Biotin, iron, and zinc delivered intravenously nourish hair follicles from within, complementing topical treatments for those experiencing thinning or slow growth. Athletic performance and recovery: Professional athletes have used IV therapy for decades. Amino acids, electrolytes, and anti-inflammatory compounds help muscles recover faster and perform more consistently. IV Drip Therapy at Wellbeing Aesthetic At Wellbeing Aesthetic, we have developed a comprehensive IV drip menu across twelve distinct formulations, each designed for a specific wellness goal. Here is an overview: Drip Name Primary Goal Key Ingredients Hydration Drip Rehydration and recovery Saline, electrolytes Vitamin C Drip Immunity and skin brightness High-dose vitamin C, antioxidants Multivitamin Drip All-round wellness Full vitamin and mineral complex Energy Drip Fatigue and burnout B vitamins, magnesium, amino acids Immunity Drip Immune support and prevention Vitamin C, zinc, antioxidants Weight Loss Drip Metabolism and detox support L-carnitine, B vitamins, minerals Glow Drip Skin clarity and radiance Glutathione, vitamin C Fitness Drip Athletic recovery and performance Amino acids, electrolytes, B vitamins Hair Health Drip Hair growth and strength Biotin, zinc, iron, B vitamins Celestial Drip (Premium) Full-body rejuvenation Premium anti-ageing complex Myers’ Cocktail Chronic fatigue, migraines, stress Magnesium, calcium, B vitamins, vitamin C Snow White Drip Skin brightening and even tone Glutathione, vitamin C During your consultation, our practitioners will review your health history, current goals, and any deficiencies or concerns to recommend the most appropriate formulation – or a combination of treatments – for your individual needs. What to Expect: Before, During, and After Your Session Before Your Session Your first IV drip session at
PRP Hair Treatment in London: How to Choose the Right Clinic for Hair Growth
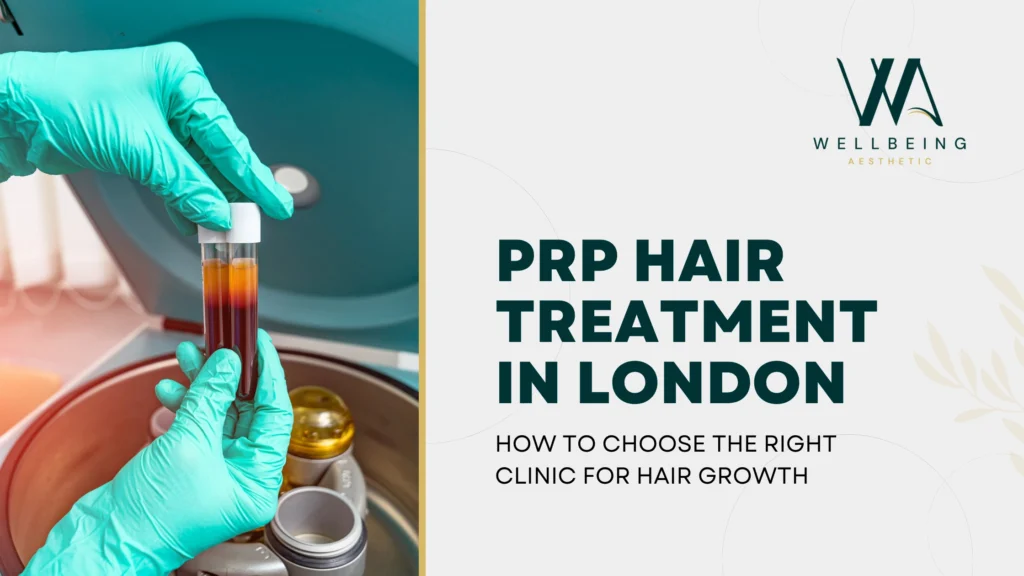
PRP Hair Treatment in London: Guide to Choosing the Right Clinic for Hair Growth There is a reason PRP has become one of the most talked about treatments in hair clinics across London. It works with your body’s own biology, requires no surgery, no daily medication, and no significant downtime – and for the right candidate, it produces measurable, visible improvements in hair growth and density. PRP stands for Platelet-Rich Plasma. It is a treatment that takes the growth factors naturally present in your own blood, concentrates them, and delivers them precisely to the scalp – where they signal follicles to become more active, produce thicker, stronger strands, and sustain a longer growth phase. If you have been researching PRP hair treatment in London, you already know that dozens of clinics offer it. What you may not know is how much the quality of treatment varies from one clinic to the next. The practitioner’s medical background, the equipment used to prepare the PRP, the concentration achieved, and the personalization of your treatment plan all directly determine how well the treatment works. This guide covers everything you need to make a confident, well-informed decision: how PRP stimulates hair growth, who it is suitable for, what results are genuinely realistic, how much it costs in London, and the seven essential checks to make before choosing your clinic. How Does PRP Treatment Stimulate Hair Growth? To understand why PRP produces results for hair growth, it helps to understand what is happening at follicle level when hair starts to thin. Thinning hair is typically the result of follicles spending too much time in the telogen phase and not enough time actively growing. PRP intervenes at a biological level. Here is how the treatment works from start to finish: A small blood sample – typically 10 to 20ml – is drawn from your arm, exactly as it would be for a standard blood test. The sample is placed in a medical-grade centrifuge that spins at high speed, separating the platelet-rich plasma from red blood cells and other components. The resulting PRP is rich in growth factors – including PDGF, VEGF, EGF, and IGF-1 – the proteins your body uses naturally for tissue repair and cellular regeneration. This concentrated plasma is then injected in precise micro-doses directly into the follicular zone of the scalp, targeting the areas where growth needs support. Once delivered to the scalp, those growth factors trigger a cascade of biological responses. They stimulate the stem cells in the hair follicle bulge, promote new blood vessel formation to improve the nutrient supply reaching each follicle, extend the active anagen growth phase, and encourage follicles that have become dormant to re-enter the growth cycle. The result is not simply reduced shedding. Over the following weeks and months, patients typically experience improved hair density, noticeably thicker and stronger individual strands, and a meaningful improvement in overall hair quality. The whole appointment takes around 45 to 60 minutes. There is no surgery, no general aesthetic, and no recovery time – most patients return to work the same day. What Hair Growth Results Can You Realistically Expect from PRP? One of the most important things to understand about PRP is that it works progressively. Hair growth is a biological process, and the results build over time rather than appearing immediately after treatment. Setting realistic expectations is essential – and any clinic that promises dramatic results quickly should be approached with caution. Here is an honest, month-by-month picture of what most patients experience: Weeks 1-4: Reduced Shedding The growth factors from your first PRP session begin signaling follicle activity almost immediately, but visible changes take time to develop. During this early phase, many patients notice that excessive shedding starts to slow down. This is an encouraging early sign that follicles are stabilizing and beginning to transition into a more active state. Weeks 6-12: Fine New Growth Appears New fine hairs begin to emerge in areas that have thinned. Hair texture often improves noticeably during this phase – existing strands may feel stronger, and the scalp looks healthier overall. This is typically when patients start to feel confident that the treatment is working. Months 3-6: Visible Density and Thickness This is the period of most visible improvement. Hair density increases; individual strands grow thicker and more robust, and the overall appearance of the hair changes significantly. Most patients notice a clear difference in photographs compared to this period to their starting point. Months 6-12: Optimal, Sustained Results With a complete initial treatment course followed by maintenance sessions, results continue to build through this period. By the six-to-twelve-month mark, patients typically experience their best outcome – fuller, healthier hair with noticeably improved density and growth quality that is maintained with ongoing care. A standard PRP hair growth protocol at Wellbeing Aesthetic involves three to four sessions spaced four to six weeks apart, followed by maintenance appointments every four to six months to sustain and build on your results. The exact number of sessions and intervals are always personalized based on your assessment and how your scalp responds. How to Choose the Right PRP Hair Clinic in London: 7 Things to Check London has more clinics offering PRP than almost any other city in the UK. The challenge is identifying which ones will actually deliver the results the treatment is capable of producing. Here are the seven things that matter most: 1. Medical Qualifications of the Practitioner PRP involves drawing blood, centrifuge processing, and injecting into the scalp. It is a clinical procedure – not a beauty treatment – and it should be performed by, or under the direct supervision of, a medically qualified professional. Before booking, ask plainly: is the person performing the treatment of a doctor, a registered nurse, or a physician associate? What specific training have they completed in PRP for hair growth? In the UK, a significant proportion of practitioners offering injectable treatments do not hold formal medical qualifications. Choosing a medically led clinic is not
PRP Treatment in London: Cost, Results, Reviews & Procedure (Complete Guide)
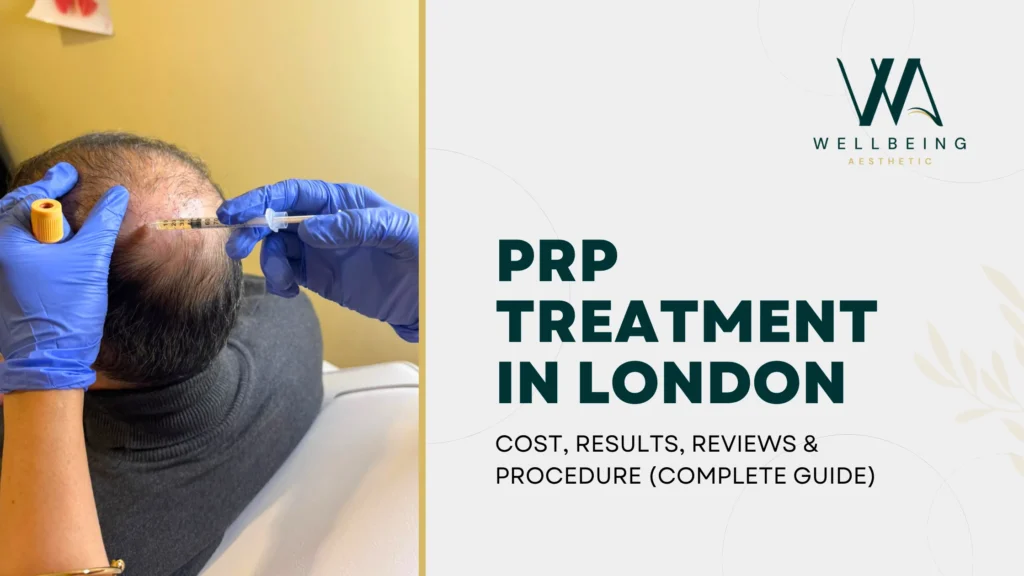
PRP Treatment in London: Cost, Results, Reviews & Procedure (Complete Guide) If you are noticing thinning hair, dull skin, or fine lines that seem to appear overnight, you are not alone – and you are probably already searching for treatments that deliver real results without the risk and downtime of treatment. That is exactly why PRP treatment in London has become one of the most in-demand regenerative procedures in the UK in 2026. PRP, or Platelet Rich Plasma, uses your body’s own growth factors to stimulate collagen production, repair damaged skin, and revive thinning hair. It is natural, minimally invasive, and backed by a growing body of clinical evidence. But with over 60 clinics now offering PRP across London, the difference in quality, pricing, and outcomes can be enormous. This guide covers everything you need to know before booking – how PRP works, what it costs, what results to expect, how long it takes, and what to look for in a clinic you can trust. What Is PRP Treatment and How Does It Work? PRP stands for Platelet Rich Plasma. It is a regenerative therapy that uses a concentrated portion of your own blood – rich in platelets and growth factors – to stimulate healing, collagen production, and tissue repair in the skin or scalp. The science behind it is straightforward. Platelets are a natural component of your blood that plays a key role in wound healing and tissue regeneration. They contain powerful growth factors including PDGF (Platelet-Derived Growth Factor), VEGF (Vascular Endothelial Growth Factor), and TGF-β (Transforming Growth Factor Beta). When these platelets are isolated, concentrated to levels three to five times higher than normal blood, and then reintroduced into targeted areas, they trigger a cascade of cellular repair – increasing collagen synthesis, promoting new blood vessel formation, and activating dormant cells. PRP treatment in London is now used for two primary purposes: skin rejuvenation (face, neck, under-eyes, hands) and hair restoration (scalp thinning and early-stage hair loss). How the PRP Procedure Works: Step by Step One of the reasons PRP has gained popularity is that the procedure itself is quick, relatively comfortable, and requires no significant downtime. Here is what a typical session looks like: Step 1 – Consultation and assessment. Before any treatment, a thorough consultation is essential. Your practitioner should review your medical history, examine the treatment area, discuss your goals, and confirm that you are a suitable candidate. At Wellbeing Aesthetic, every PRP journey begins with a personalized consultation with our medically trained team to ensure we fully understand your skin, health, and expectations before we proceed. Step 2 – Blood draw. A small sample of blood is taken from your arm – usually around 10 to 30 ml depending on the treatment area. This is the same process as a routine blood test and takes under five minutes. Step 3 – Centrifugation. The blood sample is placed in a medical-grade centrifuge and spun at a carefully calibrated speed. This separates the blood into layers: red blood cells settle at the bottom, while the platelet-rich plasma rises to the top. The concentrated PRP is then extracted for treatment. Step 4 – Preparation and numbing. The treatment area is cleaned, and a topical numbing cream is applied to minimise discomfort. Some clinics also use local anaesthetic for enhanced comfort, particularly for scalp treatments. Step 5 – PRP delivery. The concentrated PRP is reintroduced into the target area. For facial rejuvenation, this is typically done through precise micro-injections into the dermis, sometimes combined with medical grade microneedling for deeper, more even absorption. For hair restoration, PRP is injected directly into the scalp in a grid pattern across thinning areas. Step 6 – Aftercare. There is little to no downtime. You may experience mild redness, slight swelling, or minor sensitivity at the treatment site, which usually resolves within 24 to 48 hours. Most patients return to normal activities on the same day. The entire procedure – from blood draw to completion – typically takes 45 to 60 minutes. PRP for Skin Rejuvenation: What to Expect PRP facial treatment – sometimes known as the “vampire facial” – has become one of the most sought-after skin rejuvenation options in London. Unlike dermal fillers, which add volume from an external source, PRP works from within by stimulating your own skin repair mechanisms. When PRP is injected into or microneedle across the skin, the concentrated growth factors signal your fibroblasts (the cells responsible for producing collagen and elastin) to ramp up production. Over the weeks following treatment, this leads to visible improvements in skin texture, tone, elasticity, and overall radiance. What PRP facial treatment can address: Fine lines and early wrinkles, particularly around the eyes and mouth Uneven skin texture and enlarged pores Dull, tired-looking skin that lacks radiance Under-eye hollowing, dark circles, and crepey skin Acne scarring and post-inflammatory hyperpigmentation Skin laxity on the neck, décolletage, and hands Typical results timeline for facial PRP: Days 1-3: Mild redness or swelling, similar to a light sunburn. This settles quickly. Weeks 2-4: Early improvements in skin brightness and texture become noticeable. Skin starts to look fresher and more hydrated. Weeks 6-12: Collagen remodeling becomes established. Skin feels firmer, smoother, and more elastic. Fine lines begin to soften. Months 3-6: Full results develop. Many patients report the best improvements between the third and sixth months as cumulative collagen production reaches its peak. Most practitioners recommend a course of three sessions spaced four to six weeks apart for optimal results, followed by maintenance treatments every six to twelve months to sustain improvements. It is worth noting that PRP is a skin-quality treatment, not a volumiser. It will not replace lost facial volume or create dramatic structural changes. For patients seeking volume restoration, PRP can be combined with dermal fillers as part of a tailored treatment plan – something your practitioner should discuss during your consultation. PRP for Hair Restoration: Does It Actually Work? This is the question most people searching for PRP hair
IV Drip Therapy in London: Types, Benefits, Side Effects & Pricing Explained
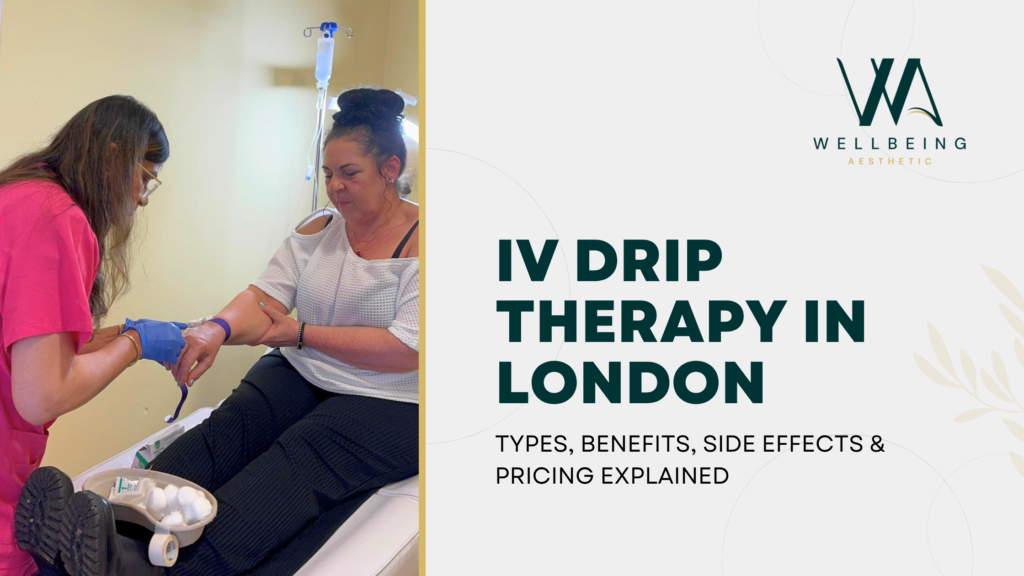
IV Drip Therapy in London: Types, Benefits, Side Effects & Pricing Explained In today’s busy world, most people struggle to get the vitamins and minerals their bodies truly need. Between demanding work schedules, fitness goals, and daily stress, oral supplements often aren’t enough to keep you feeling your best. This is where IV drip therapy comes in. IV therapy delivers vitamins, minerals, and nutrients directly into your bloodstream, achieving near-complete absorption in just hours. Unlike oral vitamins (which absorb at only 20-50%), IV drips offer 90-100% absorption rates and deliver results you can often feel within the same day. At Wellbeing Aesthetic in Croydon, London, we offer medically supervised IV drip therapy led by Dr. Huma Saeed, who brings formal medical training and NHS experience to every treatment. Whether you’re seeking an energy boost, immunity support, athletic recovery, skin health improvement, or comprehensive wellness optimization, our personalized approach ensures you get exactly what your body needs. In this guide, we will explore what IV drip therapy is, how it works, the different types available, and whether it might be the right choice for your wellness goals. Key Takeaways IV drip therapy delivers 90-100% absorption vs. 20-50% for oral supplements It’s not new-clinically proven since the 1960s Benefits range from energy and immunity to athletic recovery and anti-aging Safety depends on medical oversight, sterile protocols, and individual assessment Personalization is key-your formulation should match your unique needs Results felt within 12-24 hours; effects last 1-3 weeks What is IV Drip Therapy? IV (Intravenous) therapy is a medical-grade treatment where a customized blend of vitamins, minerals, and antioxidants is administered through a small tube into a vein. Originally used in hospitals for rapid hydration, it is now a leading trend in medical wellness and longevity, helping people optimize their health and energy levels. What Are IV Therapies Used For? IV therapy is used for a wide range of purposes depending on your individual wellness goals: Recovery & Athletic Performance Enhanced athletic performance and endurance Faster muscle recovery after training Reduced muscle soreness and fatigue Sports injury healing and tissue repair Immunity & Health Support Cold and flu prevention Faster recovery from illness Immune system strengthening during seasonal changes Post-surgical recovery and healing Energy & Mental Clarity Fighting fatigue and exhaustion Improved mental focus and concentration Stress management and burnout recovery Enhanced productivity and alertness Beauty & Anti-Aging Skin brightening and improved complexion Collagen stimulation and wrinkle reduction Hair health and growth support Anti-aging and cellular rejuvenation Targeted Health Support Hangover relief and recovery Jet lag relief during travel Digestive support and gut health Inflammation reduction Weight management support Who Would Benefit from IV Therapy? IV therapy is suitable for health-conscious adults seeking wellness optimization: Busy Professionals Demanding work schedules deplete energy and immunity High stress reduces resilience Limited time for recovery Athletes & Fitness Enthusiasts High-intensity training requires faster recovery Muscle soreness needs rapid relief Performance optimization is a priority Those Recovering from Illness Post-surgical recovery needs support Cold and flu recovery can be accelerated Weakened immune systems need strengthening Individuals with Digestive Issues IBS, Crohn’s disease, celiac disease compromise absorption IV therapy bypasses digestive challenges entirely Nutrient deficiencies can be rapidly corrected Wellness-Focused Individuals Preventative health seekers Longevity optimization focus Proactive health management Those Seeking Anti-Aging Collagen production support Cellular repair and rejuvenation Oxidative stress reduction Note: Consult your GP first if you have medical conditions or take medications. What Is the Process of IV Therapy? The IV therapy process at Wellbeing Aesthetic is straightforward and designed for your comfort: Step 1: Consultation & Assessment Medical team reviews your complete health history Discussion of your wellness goals and concerns Identification of any allergies or contraindications Recommendation of the ideal IV formulation for you All your questions answered Step 2: Preparation You’re seated in a comfortable treatment room The insertion site (usually your inner arm) is disinfected with sterile solution Step 3: Catheter Insertion A small needle is used to insert a plastic catheter into a vein The needle is immediately removed once the catheter is in place You’ll feel only a brief pinch lasting 1-2 seconds Step 4: Infusion Your personalized IV drip is connected Nutrients flow slowly into your bloodstream You can relax, read, work, or rest during infusion The process is completely painless once started Step 5: Completion Catheter is gently removed Small plaster applied to insertion site You can immediately return to normal activities No downtime required Main Types of IV Therapy: IV Push and IV Drip There are two main types of IV therapy, each with distinct advantages: What Is an IV Drip? Duration: 30-60 minutes Volume: 250-1000ml of fluids Best for: Comprehensive wellness formulations An IV drip slowly infuses a larger volume of fluid containing vitamins, minerals, and hydration. The slower infusion rate allows your body to efficiently process and utilize nutrients. Ideal for: Myers’ Cocktail and multivitamin protocols Energy and immunity support Athletic recovery Skin health and anti-aging Hangover and travel recovery Advantage: Extended infusion time allows for larger nutrient doses and a more relaxing, therapeutic experience. What Is an IV Push? Duration: 15-20 minutes Volume: 30-60ml of concentrated formula Best for: Quick nutrient delivery An IV push delivers a smaller, concentrated volume of nutrients rapidly. Best for busy schedules requiring a quick boost. Advantage: Shorter treatment time while still achieving high nutrient concentrations. What Are the Common Ingredients That IV Drips Contain? The contents of an IV drip vary depending on your wellness goals. Most formulations contain: Base Components (In Every IV Drip) Saline solution (sterile saltwater for hydration and electrolyte balance) Electrolytes (sodium, potassium, magnesium, calcium) Common Nutrient Additions Vitamin C – Immunity boosting, antioxidant support, skin brightening B Vitamins – Energy metabolism, stress resilience, nervous system support Magnesium – Muscle relaxation, energy production, stress management Glutathione – Master antioxidant, detoxification, cellular repair Amino Acids – Muscle recovery, energy production, tissue repair Zinc – Immunity support, wound healing, skin health Calcium – Bone health, nerve function, muscle contraction Specialized Additions (depending on